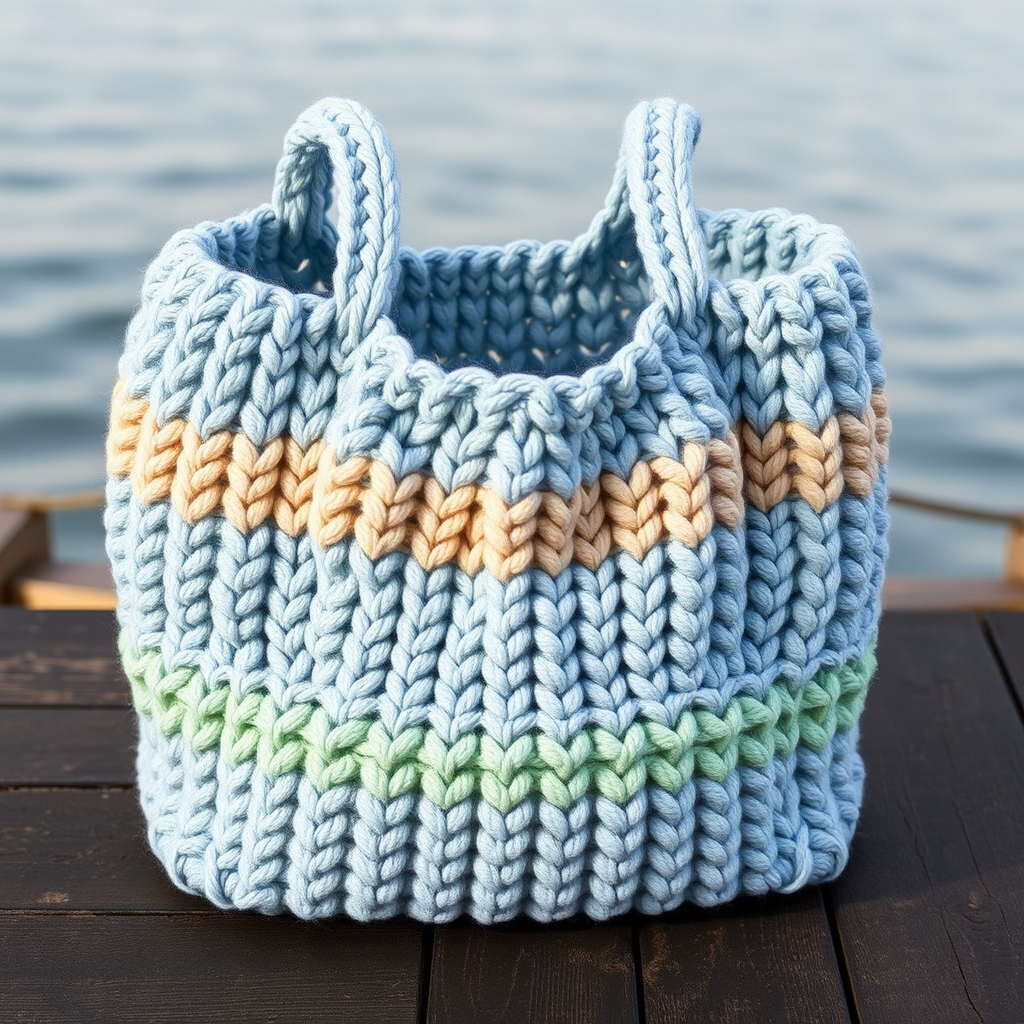
Sunwashed Linen Tote Bag Free Pattern – Textured Knit Market Carryall

Sunwashed Linen Tote Bag Free Pattern – Textured Knit Market Carryall
Imagine strolling through a sun-drenched farmers market or lounging on a sandy beach with a stylish, handcrafted tote slung over your shoulder. This breezy, retro-inspired tote bag is knitted with a soft cotton-linen blend and features a beautiful honeycomb stitch that adds both depth and durability. Perfect for carrying fresh produce, beach essentials, or your latest library haul, this bag is a stylish and practical project for knitters of all levels. The textured stitch pattern creates a basketweave-like surface with small diamond-shaped indentations, giving the bag a sunwashed, 1970s beach vibe that never goes out of style.
Whether you're a seasoned knitter looking for a quick weekend project or a beginner ready to tackle your first bag, this pattern is designed to be approachable and rewarding. The construction is simple—two flat panels seamed together with a gathered bottom—and the result is a roomy, sturdy carryall that you'll reach for all summer long. Let's dive in and create something beautiful together!
Materials Needed
Before you begin, gather the following materials. Having everything ready will make your knitting experience smooth and enjoyable.
Yarn
- Main Color (MC) 'Sand': Worsted weight cotton-linen blend (e.g., Knit Picks CotLin) – 350 yards (320 m)
- Contrast Color (CC) 'Coral': Worsted weight cotton-linen blend (e.g., Knit Picks CotLin) – 150 yards (137 m)
Note: The cotton-linen blend gives the bag its crisp, breathable texture and ensures it holds its shape even when loaded with groceries. If you prefer, you can substitute with any worsted weight cotton or cotton-acrylic blend.
Needles & Notions
- Knitting Needles: US 7 (4.5 mm) – straight or circular (if you prefer to work flat on a circular needle)
- Tapestry Needle: For seaming and weaving in ends
- Stitch Markers: Optional, but helpful for keeping track of pattern repeats
- Scissors: For cutting yarn
Gauge
20 stitches and 28 rows = 4 inches (10 cm) in honeycomb stitch (blocked).
Always take time to swatch! Gauge ensures your bag turns out the correct size. If your gauge is off, adjust your needle size accordingly—smaller needles for more stitches per inch, larger needles for fewer.
Step-by-Step Instructions
This bag is worked flat in two identical panels, then seamed together. The honeycomb stitch is simple to memorize and creates a gorgeous, textured fabric. Follow along carefully, and you'll have a beautiful tote in no time.
Pattern Notes
- The honeycomb stitch pattern is a multiple of 4 + 2 stitches.
- The bag is worked flat in two panels, then seamed.
- All slipped stitches are slipped purlwise unless otherwise noted.
- Blocking is recommended to even out the stitch pattern and give the bag a professional finish.
Honeycomb Stitch Pattern
This stitch pattern creates the beautiful, textured basketweave effect. Worked over a multiple of 4 + 2 stitches.
Row 1 (RS): *K2, P2; repeat from * to last 2 sts, K2.
Row 2 (WS): *P2, K2; repeat from * to last 2 sts, P2.
Row 3: *P2, K2; repeat from * to last 2 sts, P2.
Row 4: *K2, P2; repeat from * to last 2 sts, K2.
Repeat Rows 1–4 for the pattern. The staggered ribbing creates the honeycomb effect—each row shifts the knit/purl columns, producing those lovely diamond-shaped indentations.
Panel 1 (Make 2)
Step 1: Cast On
With Main Color (MC), cast on 42 stitches using your preferred method (long-tail cast on works beautifully here).
Step 2: Work the Honeycomb Stitch
Work in the honeycomb stitch pattern for 60 rows (approximately 15 inches / 38 cm). This will form the main body of the bag. Use stitch markers every 10 rows if you find it helpful to keep count.
Step 3: Shape the Bottom (Gathered)
Now we'll create the gathered, rounded bottom of the bag.
Next row (RS): K2tog across – you will have 21 stitches remaining.
Next row (WS): Purl across all stitches.
Next row (RS): K2tog across – you will have 11 stitches remaining (approximately; if you have 10 or 12, that's fine—just K2tog across).
Step 4: Finish the Panel
Cut the yarn, leaving a long tail (about 12 inches / 30 cm). Thread the tail through a tapestry needle, then thread it through the remaining 11 stitches on your knitting needle. Slide the stitches off the needle and pull the yarn tight to gather the bottom. Secure with a knot. This creates the rounded, gathered bottom of the bag.
Panel 2
Repeat Panel 1 exactly to create the second panel. You should now have two identical pieces with gathered bottoms.
Seaming the Panels
Step 1: Prepare the Panels
Place the two panels together with right sides facing (the wrong sides should be on the outside). Align the edges carefully, matching the cast-on edges and the gathered bottoms.
Step 2: Whipstitch the Side Seams
Using the Main Color (MC) yarn and a tapestry needle, whipstitch the side seams together. Start at the top edge and work your way down to the gathered bottom. Use a firm, even tension—you want the seam to be secure but not puckered. Leave the top edge open—this will be the opening of your bag.
Step 3: Turn Right Side Out
Once both side seams are sewn, turn the bag right side out. Gently shape it with your hands, making sure the corners and gathered bottom look neat.
Straps (Make 2)
Step 1: Cast On
With Contrast Color (CC) 'Coral', cast on 8 stitches.
Step 2: Work in Stockinette Stitch
Work in stockinette stitch (knit on the right side, purl on the wrong side) for 40 rows (approximately 10 inches / 25 cm). This will create a sturdy, slightly rolled strap. If you prefer a flatter strap, you can work in garter stitch (knit every row) instead—just note that garter stitch will be thicker and less stretchy.
Step 3: Bind Off
Bind off all stitches loosely. Cut the yarn, leaving a tail for sewing. Repeat to create the second strap.
Attaching the Straps
Step 1: Find the Center
Fold each strap in half lengthwise to find the center point. This will help you position the straps evenly on the bag.
Step 2: Position the Straps
Place the center of the strap on the inside of the bag, about 2 inches (5 cm) from the top edge and 3 inches (7.5 cm) from each side seam. This placement ensures the straps are comfortable to carry and the bag hangs nicely.
Step 3: Sew the Straps
Using a tapestry needle and the Contrast Color (CC) yarn, sew the strap ends securely to the inside of the bag. Use a sturdy whipstitch or backstitch, going through both the strap and the bag fabric. Make several passes to ensure the straps are firmly attached—they'll be bearing the weight of your belongings! Repeat for the other strap on the opposite side of the bag.
Finishing Touches
Step 1: Weave in All Ends
Using your tapestry needle, weave in all loose ends on the inside of the bag. Take your time to make sure they're secure and won't unravel with use.
Step 2: Block the Bag
Blocking is optional but highly recommended. It will even out the honeycomb stitch pattern, relax the fabric, and give your bag a professional, polished look. To block, gently hand-wash the bag in cool water with a mild soap, then lay it flat on a towel and shape it to the desired dimensions. Allow it to dry completely before using.
Step 3: Enjoy Your New Tote!
Your Sunwashed Linen Tote Bag is complete! Fill it with fresh produce, beach towels, books, or anything else your day calls for. The honeycomb texture and coral straps give it a unique, retro charm that's sure to turn heads.
Tips for Success
- Keep your tension even: The honeycomb stitch looks best when your tension is consistent. If you find your edges are uneven, try using a slightly larger needle for the first and last stitch of each row.
- Count your rows: It's easy to lose track of rows in a repeating pattern. Use a row counter or place a stitch marker every 10 rows to stay on track.
- Customize the size: Want a bigger bag? Cast on more stitches (in multiples of 4 + 2) and work more rows. For a smaller bag, cast on fewer stitches and work fewer rows.
- Make it your own: Feel free to experiment with different color combinations! The sand and coral pairing is classic, but this pattern would also look stunning in ocean blues, sage greens, or warm terracottas.
This pattern is a joy to knit and even more joyful to use. The combination of the soft cotton-linen yarn and the textured honeycomb stitch creates a bag that's both beautiful and functional. Whether you're a beginner looking to expand your skills or an experienced knitter seeking a quick, satisfying project, this Sunwashed Linen Tote is sure to become a favorite in your handmade collection. Happy knitting!