Luminous Lagoon Mosaic Knit Shawl Free Pattern
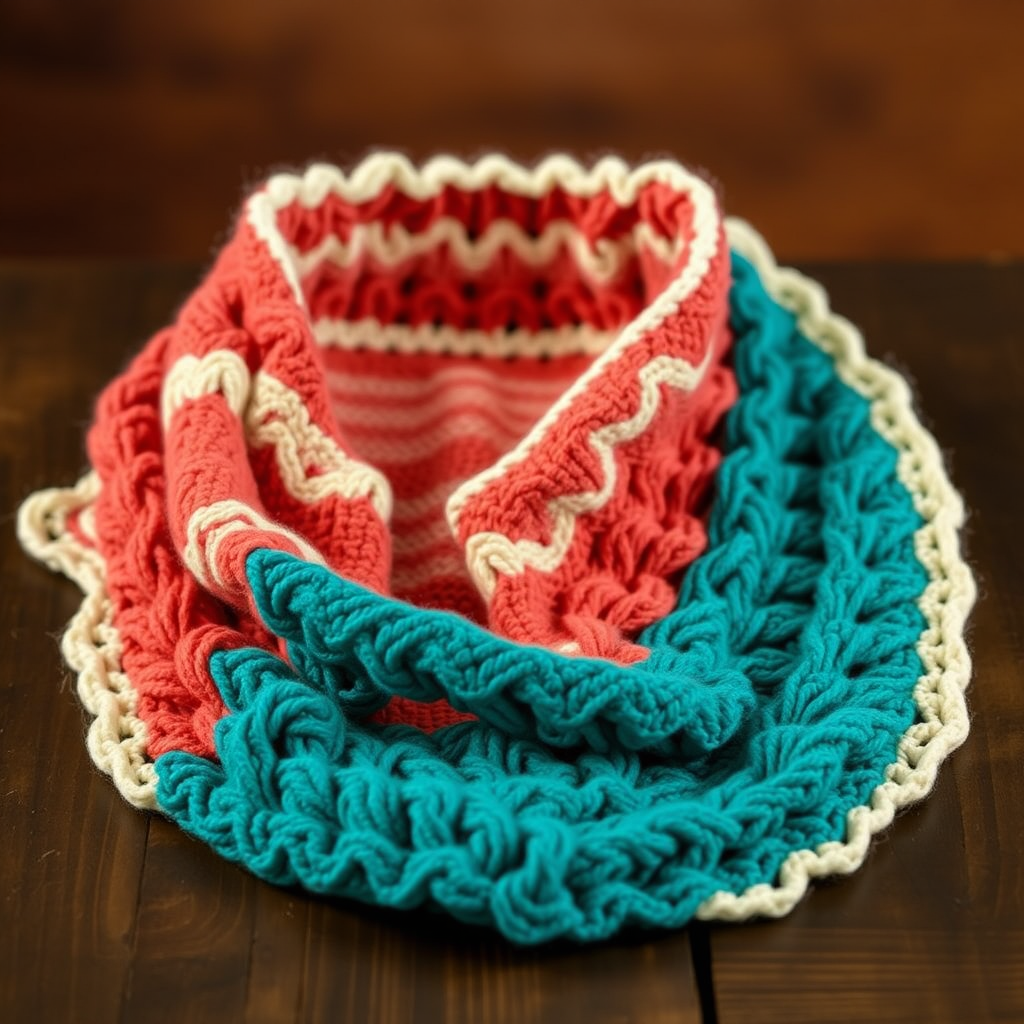
Dive Into Color: The Luminous Lagoon Mosaic Knit Shawl
Are you ready to transform simple yarn into a stunning piece of wearable art? The Luminous Lagoon Mosaic Knit Shawl is a mesmerizing project that combines the magic of colorwork with the soothing rhythm of garter stitch. This pattern is perfect for the adventurous intermediate knitter who wants to explore the world of slipped-stitch colorwork without the complexity of carrying multiple yarn strands at once. The result is a breathtaking crescent-shaped shawl that mimics the geometric beauty of ocean waves, featuring a deep teal, coral, and cream palette that evokes a tropical lagoon at sunset.
This pattern is a fantastic way to build your knitting confidence. You'll master the art of slipping stitches with the yarn in front to create a woven, textured fabric that looks far more complex than it actually is. Whether you're looking for a statement piece for your wardrobe or a thoughtful handmade gift, this shawl is sure to impress. Let's cast on and begin this colorful journey!
Materials Needed
Before we dive into the pattern, let's gather our supplies. This project is wonderfully portable and requires just a few key items:
- Yarn: Worsted weight yarn in 3 colors:
- Color A (Main): Deep Teal - approximately 400 yards
- Color B (Contrast 1): Coral - approximately 300 yards
- Color C (Contrast 2): Cream - approximately 150 yards
- Needle: US 7 (4.5 mm) circular knitting needle, 32 inches or longer. The long cable is essential to accommodate the growing number of stitches.
- Notions: Stitch markers (optional but helpful), tapestry needle for weaving in ends, and blocking pins for the final finish.
Gauge: 18 stitches and 24 rows = 4 inches in stockinette stitch (blocked). While gauge is important for size, this shawl is forgiving. The key is to maintain a consistent tension throughout your work.
Step-by-Step Instructions
This shawl is worked from the top down, increasing at the center and edges to form a beautiful crescent shape. The mosaic pattern is created by slipping stitches with the working yarn in front, creating a woven effect. Let's break it down into manageable steps.
Abbreviations
- CO: Cast on
- K: Knit
- P: Purl
- Sl: Slip stitch purlwise
- YO: Yarn over
- K2tog: Knit two together
- SSK: Slip, slip, knit
- St(s): Stitch(es)
- RS: Right side
- WS: Wrong side
- wyf: With yarn in front
- wyb: With yarn in back
Pattern Notes
- The shawl is worked in garter stitch with a mosaic pattern panel in the center.
- All slipped stitches are slipped purlwise with the working yarn held to the front (wyf) on RS rows and to the back (wyb) on WS rows.
- The mosaic pattern is worked over a multiple of 8 stitches plus 1.
Cast On & Setup
We'll begin by creating a small foundation and then quickly build up our stitch count.
With Color A: CO 3 sts.
- Row 1 (RS): K1, YO, K1, YO, K1 (5 sts)
- Row 2 (WS): K2, P1, K2
- Row 3 (RS): K2, YO, K1, YO, K2 (7 sts)
- Row 4 (WS): K3, P1, K3
- Row 5 (RS): K3, YO, K1, YO, K3 (9 sts)
- Row 6 (WS): K4, P1, K4
- Row 7 (RS): K4, YO, K1, YO, K4 (11 sts)
- Row 8 (WS): K5, P1, K5
You've now created the center spine of your shawl. The purl stitch in the center will be your guide for the center increases.
Begin Mosaic Pattern
Now the fun begins! We will continue increasing at the edges and center on every RS row while working the mosaic pattern over the center stitches. The increases are always the same: at the beginning of a RS row, knit 2, then YO. At the end of a RS row, YO, then knit 2. In the center, you will work YO, K1, YO around the center purl stitch.
Important: The edge stitches (the first 2 and last 2 stitches) are always knit. The center stitch (the purl stitch from the setup) will be knit on RS rows and purled on WS rows. The mosaic pattern is worked between the edge stitches and the center stitch.
Here is the mosaic chart, which is worked over the center stitches (a multiple of 8 + 1). Remember to work your increases on every RS row before and after this pattern section.
Mosaic Chart (worked over center sts, multiple of 8 + 1):
- Row 1 (RS, Color B): K1, *Sl 1 wyf, K7; repeat from * to last 2 sts, Sl 1 wyf, K1
- Row 2 (WS, Color B): K1, *Sl 1 wyb, K7; repeat from * to last 2 sts, Sl 1 wyb, K1
- Row 3 (RS, Color A): K1, *K3, Sl 1 wyf, K3, Sl 1 wyf; repeat from * to last 2 sts, K2
- Row 4 (WS, Color A): K1, *K3, Sl 1 wyb, K3, Sl 1 wyb; repeat from * to last 2 sts, K2
- Row 5 (RS, Color B): K1, *K1, Sl 1 wyf, K5, Sl 1 wyf; repeat from * to last 2 sts, K1, Sl 1 wyf, K1
- Row 6 (WS, Color B): K1, *K1, Sl 1 wyb, K5, Sl 1 wyb; repeat from * to last 2 sts, K1, Sl 1 wyb, K1
- Row 7 (RS, Color A): K1, *K5, Sl 1 wyf, K1, Sl 1 wyf; repeat from * to last 2 sts, K5
- Row 8 (WS, Color A): K1, *K5, Sl 1 wyb, K1, Sl 1 wyb; repeat from * to last 2 sts, K5
Repeat Rows 1-8 of the mosaic pattern, working the increases at the edges and center on every RS row. Continue until the shawl measures approximately 24 inches from the cast-on edge, ending with a WS row. As you work, the pattern will naturally expand as you add stitches, and the mosaic design will grow beautifully.
Edging
Once your shawl body is complete, it's time to add a delicate, airy border. Switch to Color C (Cream).
- Row 1 (RS): K2, YO, *K1, YO, K2tog; repeat from * to last 3 sts, K1, YO, K2 (increase at edge)
- Row 2 (WS): Knit all sts
- Row 3 (RS): K2, YO, *K2tog, YO; repeat from * to last 3 sts, K1, YO, K2
- Row 4 (WS): Knit all sts
Repeat Rows 1-4 until the edging measures 2 inches. This lace border adds a beautiful, soft contrast to the dense mosaic body.
Bind Off & Finishing
Bind off loosely knitwise. It's crucial to bind off loosely to ensure the edge remains stretchy and doesn't pucker. Weave in all ends carefully with your tapestry needle.
Blocking: This is the magic step! Blocking will transform your shawl, opening up the lace and defining the mosaic pattern. Soak the shawl in lukewarm water with a gentle wool wash for 20-30 minutes. Gently squeeze out excess water (never wring). Lay the shawl on a blocking mat and pin it out to shape, stretching the points of the crescent. Allow it to dry completely before unpinning.
Congratulations! You've just created a stunning piece of wearable art. The Luminous Lagoon Shawl is a testament to your skill and a beautiful addition to any wardrobe. Wear it with pride, knowing you've mastered the art of mosaic knitting.



