Lunar Lace Cloud Scarf Free Pattern – Knit a Celestial Mesh Wrap
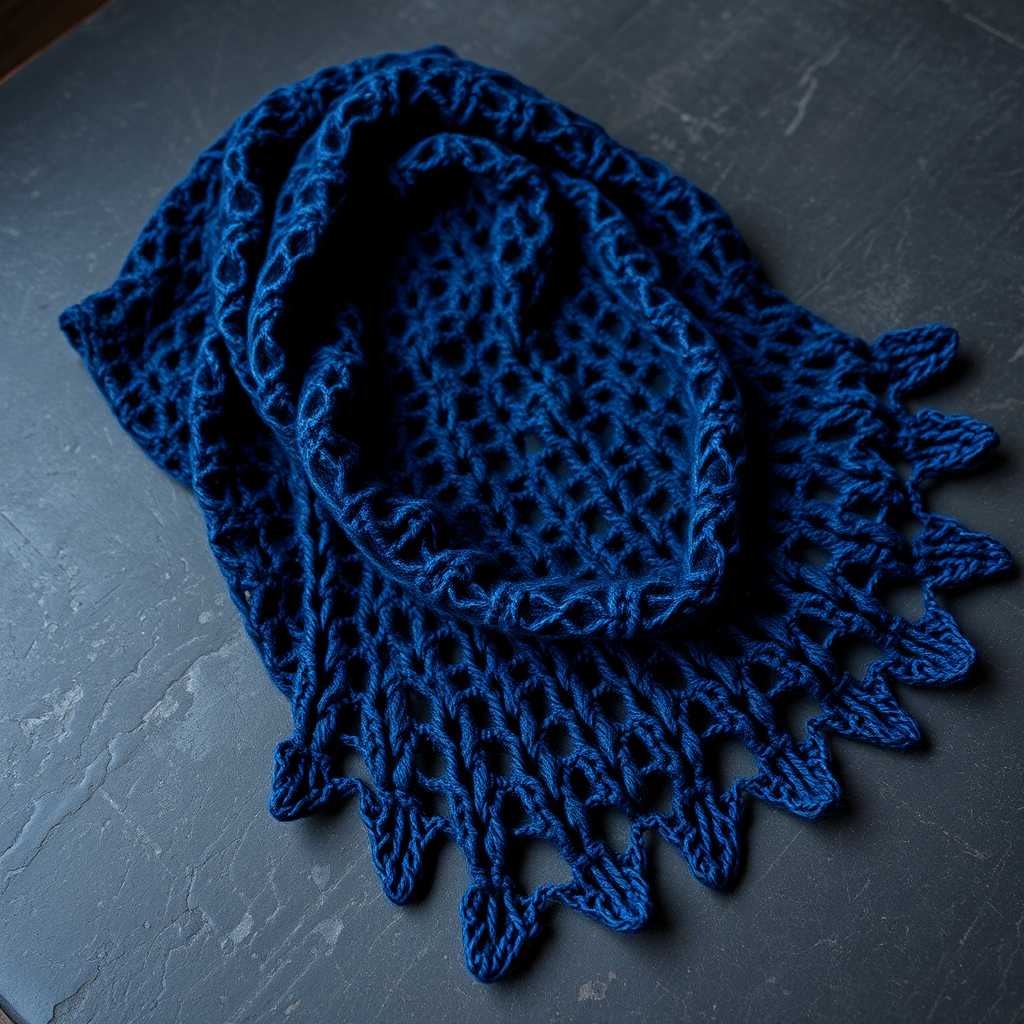
Wrap Yourself in Moonlight: Introducing the Lunar Lace Cloud Scarf
Imagine a scarf that feels like a wisp of moonlit breeze—delicate, airy, and touched with stardust. The Lunar Lace Cloud Scarf is an ethereal mesh wrap designed to drape like a soft cloud around your shoulders. This free knitting pattern combines delicate lace drops with a celestial, openwork design, creating an accessory that is both elegant and surprisingly simple to knit. Whether you're a seasoned lace knitter or a confident beginner looking for your next challenge, this scarf is a dream project that yields a stunning, star-studded result. The deep indigo yarn with silver shimmer flecks captures the magic of a night sky, making this piece a true statement of handmade artistry.
This pattern is written for a scarf measuring approximately 12 inches wide and 70 inches long, but it's wonderfully customizable. The repeating lace motif is easy to memorize, and the rhythmic rows make it a perfect project for cozy evenings. Let's dive into the celestial details and get you started on your own Lunar Lace Cloud.
Materials Needed: Gathering Your Celestial Tools
Before you begin your knitting journey, gather the following materials. The quality of your yarn will greatly affect the final drape and shimmer of your scarf.
Yarn
- 2 skeins of lace-weight yarn (e.g., Malabrigo Lace in 'Night Sky' – a deep indigo with silver shimmer flecks).
- Alternative: A light fingering weight yarn can be used for a slightly denser, more substantial drape. Choose a yarn with good stitch definition to showcase the lace pattern.
Needles & Notions
- US 6 (4.0 mm) circular knitting needle, 24-inch or longer. The circular needle is used to accommodate the large number of stitches, but you will be knitting flat, back and forth.
- Stitch markers (optional, but helpful for keeping track of pattern repeats).
- Tapestry needle for weaving in ends.
- Blocking mats and pins for the finishing process.
Gauge
20 stitches and 28 rows = 4 inches in stockinette stitch (blocked). While gauge is not critical for a scarf, matching it will help you achieve the intended dimensions and drape. Always knit a swatch and block it before measuring.
Step-by-Step Instructions: Knitting Your Celestial Mesh
This scarf is knit flat in a simple 4-row repeat that creates a cascading mesh of yarn-overs and decreases. The pattern is written for a scarf that is approximately 12 inches wide, but you can easily adjust the width by adding or subtracting multiples of 8 stitches. Follow these detailed instructions carefully, and you'll be amazed at how quickly the lace takes shape.
Abbreviations
- k = knit
- p = purl
- yo = yarn over
- k2tog = knit two together (right-leaning decrease)
- ssk = slip, slip, knit (slip two stitches knitwise, then knit them together through the back loop – left-leaning decrease)
- rep = repeat
- st(s) = stitch(es)
Pattern Notes
- The scarf is worked in a multiple of 8 + 2 stitches.
- Always slip the first stitch of each row knitwise for a neat, chain-like edge. This creates a beautiful, finished selvedge.
- The lace pattern is a 4-row repeat.
Setup: Casting On
Loosely cast on 98 stitches (or any multiple of 8 + 2). A loose cast-on is essential to prevent the edge from being too tight and pulling in the lace. You can use a long-tail cast-on or a knitted cast-on, ensuring you don't pull the yarn too tightly.
The Lace Pattern
Once your stitches are cast on, you're ready to begin the magical lace pattern. Follow these rows carefully.
Row 1 (Right Side): Slip 1 knitwise, k1, *yo, k2tog, k4, ssk, yo, k2*; rep from * to * until 2 stitches remain, k2.
Explanation: This row creates the first set of eyelets. The yarn-overs (yo) create holes, while the k2tog and ssk decreases keep the stitch count balanced. The k4 in the middle forms the solid base of the diamond shape.
Row 2 (Wrong Side): Slip 1 knitwise, purl all stitches to end.
Explanation: This is a simple purl row. It creates the stockinette background and sets up the next lace row. Remember to slip the first stitch knitwise.
Row 3: Slip 1 knitwise, k1, *k2, yo, ssk, k2, yo, k2tog*; rep from * to * until 2 stitches remain, k2.
Explanation: This row shifts the lace pattern, creating the staggered, cascading effect. Notice how the decreases and yarn-overs are positioned differently to form the second half of the diamond shape.
Row 4: Slip 1 knitwise, purl all stitches to end.
Explanation: Another purl row to complete the 4-row repeat. The pattern is now set.
Continuing the Pattern
Repeat Rows 1–4 until your scarf measures approximately 68 inches from the cast-on edge, or until you have about 2 yards of yarn left (reserved for the bind-off). This will give you a finished length of about 70 inches after blocking. The scarf will grow slightly when blocked, so it's better to stop a little early than to run out of yarn.
Binding Off
Bind off on a Right Side row (Row 1 or 3 of the pattern) to ensure the edge matches the cast-on. Use a stretchy bind-off to maintain the scarf's drape.
Stretchy Bind-Off Instructions: Slip 1 knitwise, k1, *pass the slipped stitch over the knit stitch (like a standard bind-off), knit the next stitch*; repeat across the row until one stitch remains. Cut yarn, leaving a 6-inch tail, and pull through the last loop. Weave in all ends with your tapestry needle.
Blocking: The Final Magic
Blocking is crucial for lace knitting—it opens up the pattern and transforms your work into a beautiful, ethereal mesh. Follow these steps for a professional finish.
- Soak: Submerge the scarf in lukewarm water with a drop of wool wash or mild detergent for 20 minutes.
- Gently Squeeze: Carefully remove the scarf and gently squeeze out excess water. Do not wring or twist, as this can felt the yarn and ruin the lace.
- Lay Flat: Lay the scarf flat on a clean, dry towel. Roll the towel up with the scarf inside to absorb more water.
- Pin and Stretch: Place the scarf on blocking mats. Gently stretch it to the desired dimensions (12 inches wide by 70 inches long). Pin the edges to create a gentle scallop effect if desired, following the natural points of the lace. This will enhance the cloud-like, wispy quality of the scarf.
- Dry Completely: Allow the scarf to dry completely before unpinning and wearing. This can take 24-48 hours depending on your environment.
Once dry, your Lunar Lace Cloud Scarf is ready to wear. The delicate mesh will catch the light, and the silver shimmer flecks will twinkle like stars. This scarf is perfect for adding a touch of celestial elegance to any outfit, and it makes a truly special handmade gift. Enjoy the process, and happy knitting!



