Nocturne Nest Owl Ear Warmer Free Pattern – Knit a Cozy Midnight Wrap
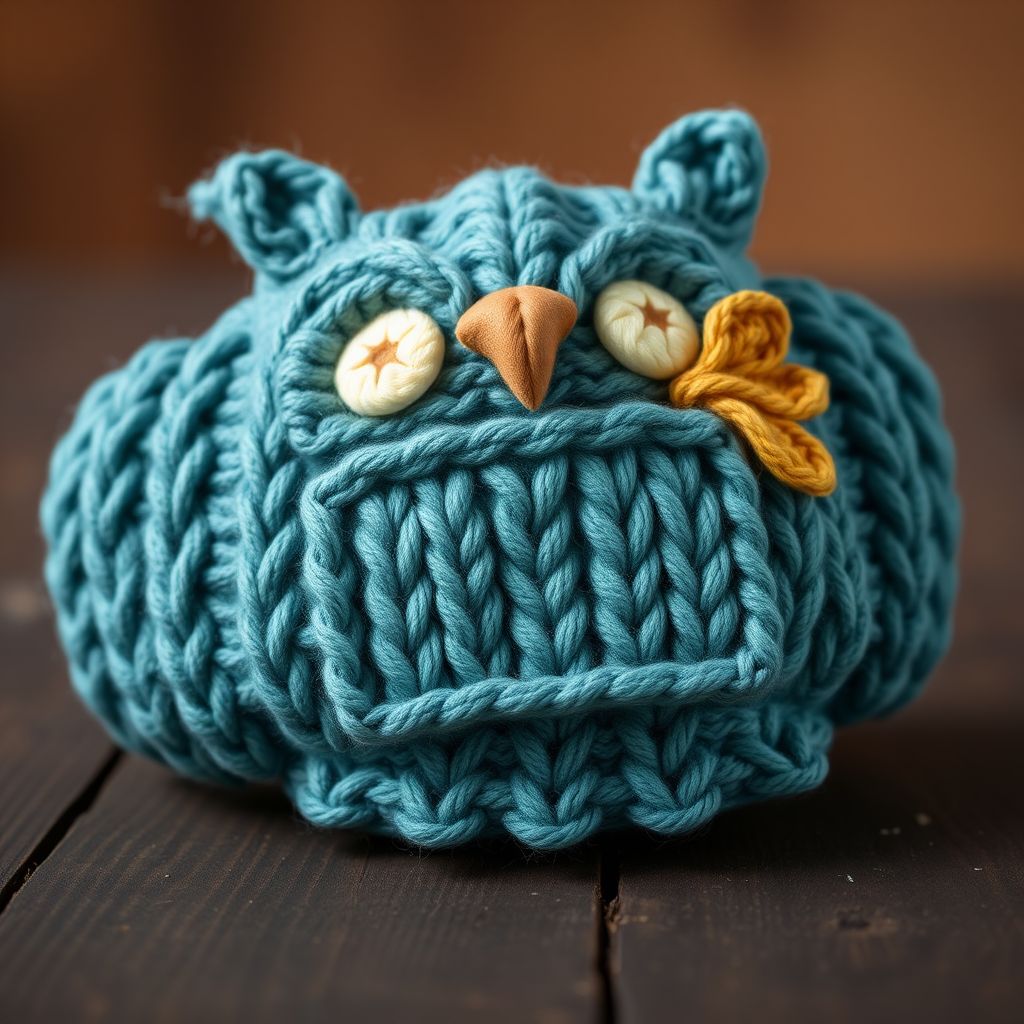
Wrap Yourself in Moonlit Magic: The Nocturne Nest Owl Ear Warmer
There's something undeniably enchanting about the quiet hours of a moonlit forest—the hush of the trees, the soft glow of stars, and the gentle call of an owl. Now, you can capture that whimsical charm in a cozy, handcrafted accessory with the Nocturne Nest Owl Ear Warmer. This free knitting pattern combines a rich tapestry of cables and textured stitches to create a piece that's as delightful to make as it is to wear. Whether you're a seasoned knitter looking for a quick weekend project or a confident beginner ready to tackle your first cables, this ear warmer is the perfect way to keep chilly evenings at bay while adding a touch of woodland magic to your winter wardrobe.
With its deep teal body, warm cream accents, and adorable owl face, this ear warmer is more than just a practical accessory—it's a statement piece. The intricate cable pattern mimics the texture of owl feathers, while the whimsical wings and sleepy eyes bring the whole design to life. Let's dive into this pattern and create something truly special together.
Materials Needed
Before you begin, gather the following materials to ensure a smooth and enjoyable knitting experience:
- Yarn: Worsted weight yarn in deep teal (MC) and warm cream (CC). You'll need approximately 150 yards of MC and 50 yards of CC. Choose a soft, plush yarn for the best texture and warmth.
- Needles: US 7 (4.5 mm) knitting needles. A cable needle is also essential for the cable stitches.
- Notions: A tapestry needle for weaving in ends and sewing pieces together, plus a pair of scissors.
- Gauge: 20 stitches and 28 rows = 4 inches in stockinette stitch. Be sure to check your gauge to ensure the finished size fits correctly.
Finished Size: This pattern fits an adult head circumference of 20-22 inches, making it a versatile and comfortable accessory for most wearers.
Step-by-Step Instructions
This pattern is worked in several parts: the ear warmer body, the owl face, the eyes, the beak, and the wings. Each piece is knitted separately and then sewn together to create the final charming design. Follow along carefully, and you'll have a beautiful owl ear warmer in no time.
Abbreviations
- CO: Cast on
- K: Knit
- P: Purl
- K2tog: Knit two stitches together (decrease)
- SSK: Slip, slip, knit (decrease)
- C4B: Slip 2 stitches to cable needle, hold to back, knit next 2 stitches, then knit 2 from cable needle
- C4F: Slip 2 stitches to cable needle, hold to front, knit next 2 stitches, then knit 2 from cable needle
- MC: Main color (deep teal)
- CC: Contrast color (warm cream)
Ear Warmer Body (Worked Flat)
With MC, cast on 24 stitches.
Ribbing:
- Row 1 (RS): K2, P2, K2, P2, K2, P2, K2, P2, K2, P2, K2, P2 (this is a 2x2 ribbing pattern)
- Row 2 (WS): P2, K2, P2, K2, P2, K2, P2, K2, P2, K2, P2, K2
Repeat rows 1-2 until the ribbing measures 2 inches from the cast-on edge, ending with a wrong-side row.
Begin Cable Pattern:
- Row 1 (RS): K2, P2, C4B, P2, K2, P2, C4F, P2, K2, P2, K2
- Row 2 (WS): P2, K2, P4, K2, P2, K2, P4, K2, P2, K2, P2
- Row 3 (RS): K2, P2, K4, P2, K2, P2, K4, P2, K2, P2, K2
- Row 4 (WS): P2, K2, P4, K2, P2, K2, P4, K2, P2, K2, P2
- Row 5 (RS): K2, P2, C4F, P2, K2, P2, C4B, P2, K2, P2, K2
- Row 6 (WS): P2, K2, P4, K2, P2, K2, P4, K2, P2, K2, P2
- Row 7 (RS): K2, P2, K4, P2, K2, P2, K4, P2, K2, P2, K2
- Row 8 (WS): P2, K2, P4, K2, P2, K2, P4, K2, P2, K2, P2
Repeat rows 1-8 until the piece measures 18 inches from the cast-on edge, ending with a wrong-side row.
Final Ribbing:
Repeat rows 1-2 of the ribbing pattern for 2 inches. Bind off in pattern (knit the knit stitches and purl the purl stitches as you bind off).
Owl Face (Worked Separately, Then Sewn On)
With MC, cast on 12 stitches.
- Row 1 (RS): Knit all stitches
- Row 2 (WS): Purl all stitches
Repeat rows 1-2 until the piece measures 3 inches, ending with a wrong-side row. Bind off all stitches.
Eyes (Make 2)
With CC, cast on 6 stitches.
- Row 1 (RS): Knit all stitches
- Row 2 (WS): Purl all stitches
Repeat rows 1-2 until the piece measures 1 inch. Bind off. Fold each square in half diagonally to form a triangle, and sew the edges together to create a small eye patch.
Beak (Make 1)
With CC, cast on 4 stitches.
- Row 1 (RS): Knit all stitches
- Row 2 (WS): Purl all stitches
- Row 3 (RS): K2tog, K2 (3 stitches remain)
- Row 4 (WS): Purl all stitches
- Row 5 (RS): K2tog, K1 (2 stitches remain)
- Row 6 (WS): Purl all stitches
- Row 7 (RS): K2tog (1 stitch remains)
Cut the yarn, leaving a tail, and pull it through the remaining stitch to secure. This forms a small triangle.
Wings (Make 2)
With MC, cast on 8 stitches.
- Row 1 (RS): Knit all stitches
- Row 2 (WS): Purl all stitches
- Row 3 (RS): SSK, K4, K2tog (6 stitches remain)
- Row 4 (WS): Purl all stitches
- Row 5 (RS): SSK, K2, K2tog (4 stitches remain)
- Row 6 (WS): Purl all stitches
- Row 7 (RS): SSK, K2tog (2 stitches remain)
- Row 8 (WS): Purl all stitches
- Row 9 (RS): K2tog (1 stitch remains)
Cut the yarn, leaving a tail, and pull it through the remaining stitch. This creates a tapered wing shape.
Finishing Touches
Now comes the fun part—assembling your owl! Follow these steps to bring your ear warmer to life:
- Sew the ear warmer ring: With the right side facing out, sew the short ends of the ear warmer body together to form a seamless ring. Use a mattress stitch or whip stitch for a neat finish.
- Position the owl face: Place the owl face piece centered on the front of the ear warmer, about 1 inch from the top edge. Pin it in place, then sew it securely using a tapestry needle and matching yarn.
- Attach the eyes: Position the two eye patches side by side on the face, slightly angled toward each other for a sleepy, whimsical look. Sew them in place with small, neat stitches.
- Sew the beak: Place the beak just below the eyes, pointing downward. Sew it securely, making sure the point of the triangle faces down.
- Add the wings: Sew the wings on either side of the face, angled slightly upward for a playful, fluttering effect. Overlap them slightly with the face piece for a cohesive look.
- Weave in all ends: Use your tapestry needle to weave in any loose yarn ends on the wrong side of the work. This ensures a clean, professional finish.
- Block gently: To shape your ear warmer and even out the stitches, gently block it by wetting it lightly and laying it flat to dry. This will help the cables and textures stand out beautifully.
And there you have it—your very own Nocturne Nest Owl Ear Warmer! This cozy, whimsical accessory is perfect for crisp autumn walks, snowy commutes, or simply curling up by the fire with a good book. The rich cable texture and charming owl details make it a wonderful gift for a loved one (or a treat for yourself).
We'd love to see your finished creation! Share your photos on social media with the hashtag #NocturneNestOwl and tag us so we can admire your handiwork. Happy knitting, and may your nights be filled with moonlit magic and cozy warmth!



