Starlight Driftwood Throw Free Pattern – Knit a Celestial Beach Blanket
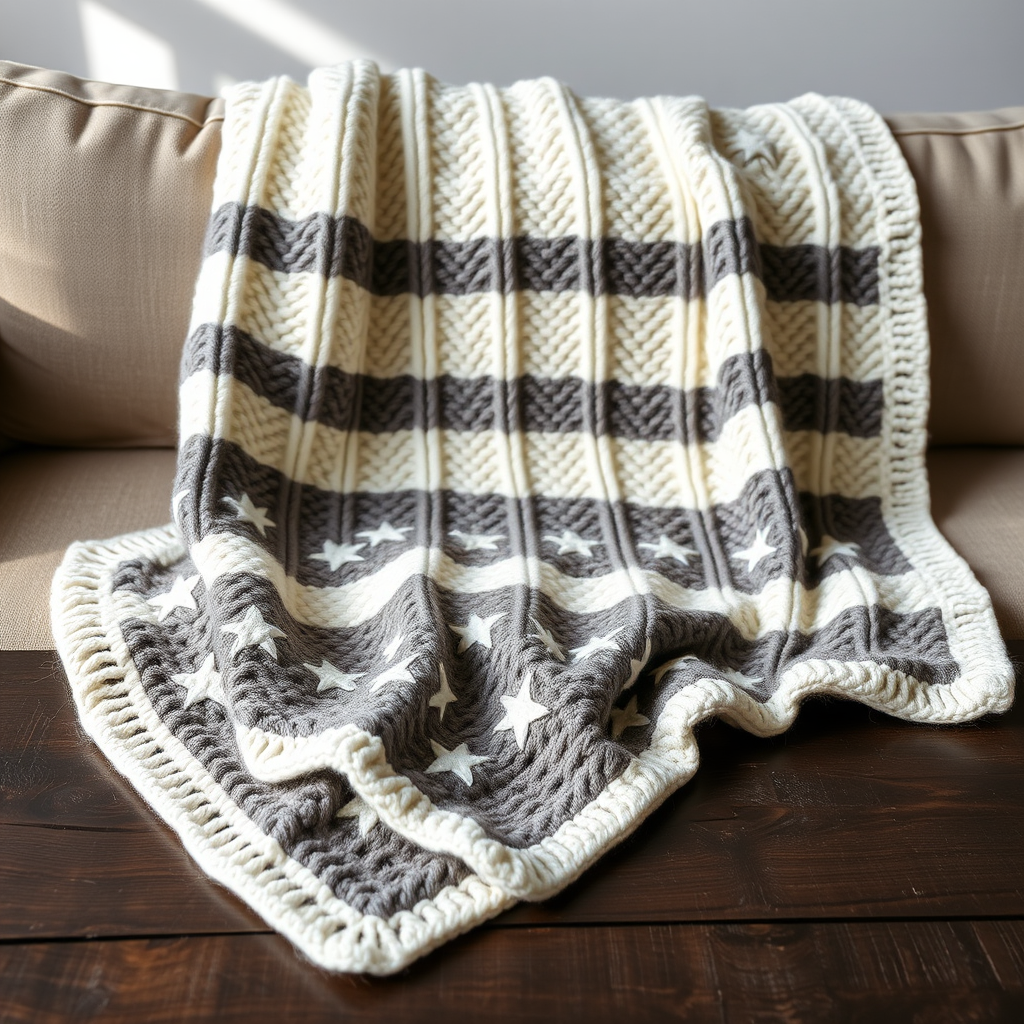
Introducing the Starlight Driftwood Throw: A Celestial Knit for Cozy Nights
Imagine the quiet magic of a moonlit beach—the soft hush of waves, the silver glow on the sand, and a sky scattered with stars. That serene, celestial beauty is now something you can wrap yourself in. The Starlight Driftwood Throw is a stunning knit blanket that blends soft ivory and driftwood grey in a mesmerizing, textured star stitch. This cozy, handmade throw brings the calm of a starry shoreline right into your living space, making it the perfect project for knitters who crave a beautiful, meditative make.
This free knitting pattern is designed to be accessible yet rewarding. The repeating star stitch creates a dense, woven-looking fabric that is both warm and visually captivating. Whether you're an experienced knitter looking for a relaxing project or a confident beginner ready for a new challenge, this throw is a wonderful way to create a heirloom-quality piece for your home. Let’s get started on crafting your own celestial beach blanket.
Materials Needed for Your Starlight Throw
Before you begin, gather your supplies. This project uses simple, readily available materials to create a luxurious result.
Yarn
- Yarn A (Ivory): Approx. 1200 yards of worsted weight yarn. This will be your main color for the base and borders.
- Yarn B (Driftwood Grey): Approx. 1200 yards of worsted weight yarn. This is your contrasting color for the star stitch bands.
Tip: Choose a soft, durable worsted weight yarn (like a wool blend or premium acrylic) to ensure your throw is both cozy and easy to care for.
Knitting Needles
- US Size 9 (5.5 mm) knitting needles. A circular needle (32" or longer) is highly recommended to hold the large number of stitches comfortably, but you can use straight needles if you prefer.
Other Supplies
- Tapestry needle for weaving in ends
- Scissors
- Stitch markers (optional, but helpful for keeping track of pattern repeats)
Gauge
- 16 stitches and 22 rows = 4 inches in stockinette stitch. Always knit a swatch to ensure your gauge matches. This will help your finished throw measure approximately 50" x 60".
Step-by-Step Instructions: Knitting the Starlight Driftwood Throw
This pattern is worked flat in one piece, from the bottom up. The star stitch is a simple 8-row repeat that creates a beautiful, textured fabric. Follow these detailed instructions carefully, and you'll be amazed at the result.
Getting Started: Cast On & Border
Finished Size: Approximately 50" x 60".
Notes:
- The blanket is worked flat in one piece.
- When changing colors, carry the unused yarn up the side of your work. This creates a neat edge and avoids weaving in many ends.
- The star stitch pattern is a multiple of 4 + 2 stitches. Our cast-on number (202) follows this rule perfectly.
Step 1: Cast On
With Yarn A (Ivory), cast on 202 stitches loosely. A long-tail cast-on works beautifully here. Ensure your cast-on is not too tight, as this will be the bottom edge of your blanket.
Step 2: Knit the Bottom Border
Work in garter stitch (knit every row) for 6 rows with Yarn A. This creates a clean, sturdy foundation for your blanket.
Knitting the Star Stitch Body
Now you will begin the main body of the blanket. The pattern is an 8-row repeat. Pay close attention to the yarn changes and the stitch placements.
Row 1 (Right Side): With Yarn A, knit all stitches.
Row 2 (Wrong Side): With Yarn A, purl all stitches.
Row 3 (Right Side): Switch to Yarn B. K2, *k1, yo, k2tog, k1; repeat from * to the last 2 stitches, k2.
Detailed Breakdown of Row 3: Knit 2 stitches. Then, repeat the following sequence across the row: Knit 1, yarn over (bring the yarn to the front, then over the needle to the back, creating a new loop), knit 2 stitches together, knit 1. Continue this sequence until only 2 stitches remain on your left needle, then knit those last 2 stitches.
Row 4 (Wrong Side): With Yarn B, purl all stitches.
Row 5 (Right Side): Switch to Yarn A. Knit all stitches.
Row 6 (Wrong Side): With Yarn A, purl all stitches.
Row 7 (Right Side): Switch to Yarn B. K2, *k2tog, yo, k1, k1; repeat from * to the last 2 stitches, k2.
Detailed Breakdown of Row 7: Knit 2 stitches. Then, repeat the following sequence across the row: Knit 2 stitches together, yarn over, knit 1, knit 1. Continue this sequence until only 2 stitches remain, then knit those last 2 stitches. This row staggers the star pattern, creating the beautiful offset effect.
Row 8 (Wrong Side): With Yarn B, purl all stitches.
Repeat Rows 1-8 until your piece measures approximately 56 inches from the cast-on edge. It's best to end with a Row 8 to ensure you are ready to start the top border with Yarn A on a right-side row.
Finishing the Top Border & Bind Off
Once your blanket reaches the desired length, it's time to finish it off with a matching border.
Step 1: Knit the Top Border
With Yarn A, knit 6 rows in garter stitch (knit every row). This mirrors the bottom border and gives your throw a polished, symmetrical look.
Step 2: Bind Off
Bind off all stitches loosely with Yarn A. A loose bind-off is crucial to prevent the edge from pulling or curling. You can use a larger needle to bind off if you find it's too tight.
Step 3: Weave in Ends
Using your tapestry needle, carefully weave in all loose ends on the wrong side of the blanket. Take your time to secure them well so your throw lasts for years to come.
Once you've woven in the last end, give your Starlight Driftwood Throw a gentle block if desired. Lay it flat to dry, and it will be ready to drape over your sofa, adding a touch of celestial calm to your home. Happy knitting!



