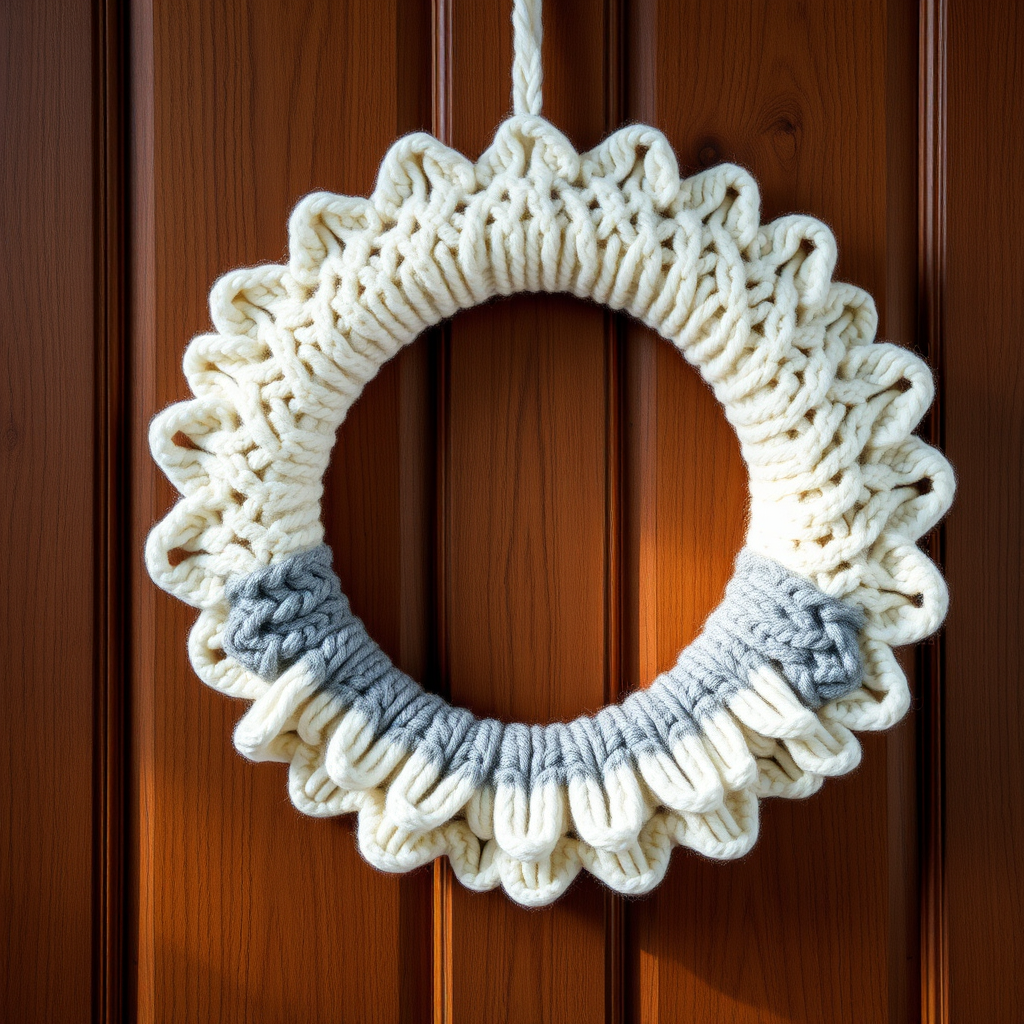
The Evergreen Embrace Wreath Free Pattern – Knit a Plush Woodland Door Decor

The Evergreen Embrace Wreath: A Free Knitted Woodland Door Decor Pattern
Imagine greeting your guests with a wreath that isn't just store-bought, but a plush, hand-knitted statement piece that whispers cozy woodland charm. The Evergreen Embrace Wreath is a unique knitting project that transforms simple worsted weight yarn into a lush, dimensional door decoration. With its textured pine needle panels and soft berry accents, this wreath brings a touch of handmade warmth to any entryway. Whether you're a seasoned knitter looking for a new challenge or a beginner eager to create something stunning, this free pattern is your gateway to a beautiful, custom piece of home decor.
This pattern is designed to be accessible, using basic knit and purl stitches to create a truly impressive result. The magic lies in the assembly, where six tapered panels are fanned into a full, circular wreath. Let's dive into the materials and steps to create your own Evergreen Embrace.
Materials Needed
Before you begin, gather the following supplies to ensure a smooth and enjoyable knitting experience. The total yarn weight is approximately 250g, but this can vary slightly based on your tension.
- Yarn: Worsted weight yarn in three colors:
- Forest Green (approx. 150g) – for the main pine needle panels
- Moss Green (approx. 50g) – for optional accent leaves or a second pine needle panel
- Deep Red (approx. 50g) – for the berry clusters
- Knitting Needles: US 8 (5mm) knitting needles. You can use straight or circular needles, whichever you prefer.
- Yarn Needle: A large-eyed tapestry or yarn needle for seaming and weaving in ends.
- Scissors: For cutting yarn.
- Optional: A stitch marker to help keep track of your rows.
Gauge: 18 stitches and 24 rows = 4 inches in stockinette stitch. While gauge isn't critical for this project's final size, maintaining a consistent tension will ensure your panels are uniform and your wreath is balanced.
Step-by-Step Instructions
Follow these detailed instructions to create your own Evergreen Embrace Wreath. The pattern is broken down into three main parts: the pine needle panels, the berry clusters, and the final assembly. Take your time, and enjoy the process of watching your wreath come to life.
Part 1: Pine Needle Panels (Make 6)
These panels form the body of your wreath. Each one is a simple tapered shape that, when combined, creates a full, layered circle. You will make six panels total. You can use forest green for all six, or mix in a moss green panel for added depth and visual interest.
- Cast On: With your forest green (or moss green) yarn, cast on 12 stitches. Leave a tail of about 6 inches to weave in later.
- Row 1 (Right Side): Knit all stitches. This is the right side of your work, which will face outward on the wreath.
- Row 2 (Wrong Side): Purl all stitches.
- Repeat: Continue repeating Rows 1 and 2 (stockinette stitch) until your piece measures 12 inches from the cast-on edge. It's helpful to measure as you go to ensure all panels are the same length.
- Decrease Row (Right Side): Knit two stitches together (K2tog) across the row. You will have 6 stitches remaining on your needle. This begins the taper of your pine needle.
- Finish: Cut your yarn, leaving a long tail (about 12 inches). Thread this tail onto your yarn needle. Slide the needle through all 6 remaining stitches on your knitting needle, then gently pull the yarn tight. This will cinch the top of the panel closed, creating a rounded, tapered point. Secure the yarn with a knot and set the panel aside. Repeat this entire process to create a total of 6 panels.
Part 2: Berry Clusters (Make 5)
These small, plump berries add a pop of festive color and a lovely textural contrast to the pine needles. They are quick to knit and incredibly simple.
- Cast On: With your deep red yarn, cast on 3 stitches. Leave a short tail.
- Row 1: Knit all stitches.
- Row 2 (Increase): Knit 1, then knit into the front and back of the next stitch (kfb), then knit 1. You will now have 4 stitches on your needle.
- Row 3: Knit all stitches.
- Row 4 (Decrease): Knit two together (K2tog) twice. You will have 2 stitches remaining.
- Row 5: Knit all stitches.
- Finish: Knit two together (K2tog) once more. You will have 1 stitch left. Cut the yarn, leaving a tail, and pull it through the last loop to secure. This creates a small, rounded, 3D berry shape. Weave in the cast-on tail, but leave the finishing tail long for sewing onto the wreath. Make a total of 5 berries.
Part 3: Assembly
This is where your individual pieces come together to form the beautiful wreath. Take your time with this step to ensure a balanced and secure final product.
- Arrange the Panels: Lay your 6 pine needle panels on a flat surface. Arrange them in a circular fan shape. The tapered, cinched ends should all point toward the center, and the wide, cast-on ends should point outward. Overlap the panels slightly to create a full, lush look. Play with the arrangement until you are happy with the shape.
- Seam the Panels: Thread your yarn needle with a long piece of forest green yarn. Starting at the center, use a whip stitch to sew the panels together along their inner, overlapping edges. Secure them firmly to create a ring. Do not sew the outer edges together; leaving them free will give your wreath its textured, dimensional, layered appearance.
- Attach the Berries: Using the long tails on your berry clusters, sew them evenly around the wreath. Nestle them among the pine needle panels, tucking them slightly into the folds for a natural look. Distribute all 5 berries evenly around the circle.
- Create a Hanging Loop: Cut a 10-inch piece of forest green yarn. Fold it in half to form a loop. Using your yarn needle, sew the two loose ends securely to the top back of the wreath, where two panels meet. Make sure it is firmly attached so it can support the weight of the wreath.
- Weave in Ends: Carefully weave in all remaining loose ends from your knitting and assembly using your yarn needle. This will give your wreath a clean, professional finish.
- Optional Embellishments: For extra dimension, you can knit a few simple leaves in moss green and sew them among the berries. To make a simple leaf, cast on 3 stitches, knit one row, then increase (kfb) at the start of the next row, knit one row, and then decrease (k2tog) and bind off. This adds a lovely finishing touch.
Once you've completed these steps, your Evergreen Embrace Wreath is ready to hang! Its plush, textured surface and handcrafted charm will make it a cherished piece of your home decor for years to come. Enjoy the compliments, and the cozy feeling it brings to your door.