The Evergreen Expansion Crochet Blanket Free Pattern – Add Width Without the Fuss
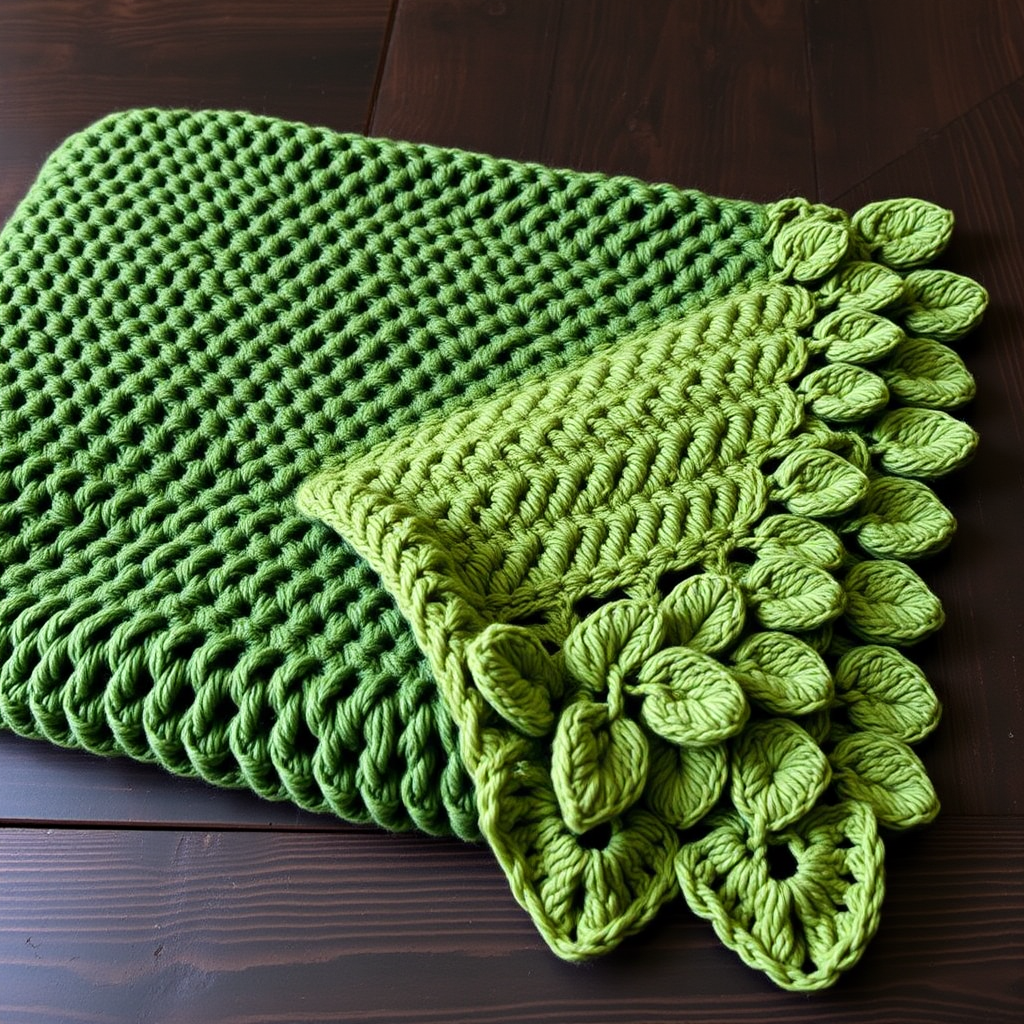
The Evergreen Expansion Crochet Blanket: A Beginner-Friendly Guide to Adding Width Seamlessly
Have you ever finished a crochet blanket only to wish it were just a little bit wider? Or perhaps you've inherited a beloved throw that needs a fresh, modern update? The Evergreen Expansion Crochet Blanket pattern is your answer. This isn't just another blanket pattern—it's a technique that teaches you the art of widening any blanket with a seamless, organic join that looks like pure magic.
Inspired by the lush, layered beauty of a forest floor, this pattern guides you through adding a textured, leafy panel to an existing blanket. The result is a cozy, earthy masterpiece that drapes beautifully and feels wonderfully substantial. Best of all, this pattern is designed with beginners in mind, breaking down the process into clear, manageable steps that will leave you feeling confident and accomplished.
Let's dive in and learn how to expand your crochet world—one beautiful stitch at a time.
Why You'll Love This Pattern
This isn't just about making a blanket bigger; it's about transformation. The Evergreen Expansion technique allows you to:
- Rescue unfinished projects: Turn a too-small blanket into the perfect size.
- Customize your comfort: Add width to any side of any blanket you own.
- Learn a professional skill: Master the "slip stitch join as you go" method for invisible, flexible seams.
- Create a unique design: The decorative leaf border adds a stunning, three-dimensional finish that elevates the entire piece.
Materials Needed
Before you begin, gather your supplies. This project is wonderfully portable and requires minimal tools.
Yarn
- Worsted weight yarn in three shades of green (e.g., Forest, Moss, and Sage) and a cream accent for the border. The original pattern uses a rich forest green for the main blanket, a lighter moss green for the added panel, and a vibrant sage green for the leaf border.
Hook & Notions
- 5.5 mm (I-9) crochet hook—the perfect size for worsted weight yarn to create a dense, cozy fabric.
- Stitch markers to mark your starting and ending points.
- Yarn needle for weaving in ends.
- Scissors.
Gauge
For best results, match this gauge: 14 stitches and 10 rows = 4 inches in half double crochet (hdc). While gauge isn't critical for a blanket, it helps ensure your added panel matches the drape of your existing blanket.
Step-by-Step Instructions: The Evergreen Expansion Technique
Follow these detailed instructions to seamlessly add width to your blanket. This pattern assumes you have a basic understanding of chain (ch), half double crochet (hdc), single crochet (sc), and double crochet (dc) stitches.
Understanding the Technique
The secret to a flawless expansion lies in creating a new panel that perfectly matches the stitch pattern of your existing blanket. We'll use a simple half double crochet (hdc) panel with a decorative 'leaf' stitch border. This technique can be adapted to any stitch pattern you love.
Step 1: Prepare Your Blanket
- Lay your blanket flat on a clean surface.
- Decide which side you want to add width to.
- Use stitch markers to clearly mark the starting and ending points of the edge you'll be working with.
- Check the edge: Ensure the edge is even. If it's wavy or uneven, work a row of single crochet (sc) across the entire edge to even it out. This creates a clean, stable foundation for your new panel.
Step 2: Foundation Chain
- Determine your desired additional width. For example, if you want to add 12 inches, you'll need to chain accordingly.
- Using your moss green yarn, create a foundation chain that matches the width of your blanket's edge. Important: The number of chains should be a multiple of your stitch pattern. For this hdc pattern, chain a multiple of 2 + 1 (e.g., 21, 31, 41, etc.) to ensure the stitch count aligns perfectly.
Step 3: First Row of the New Panel
- Row 1: Work a half double crochet (hdc) into the 3rd chain from your hook. (The skipped chains count as your first hdc.)
- Continue working 1 hdc into each chain across the row.
- At the end of the row, chain 2 and turn your work. The chain 2 counts as your first hdc for the next row.
Step 4: Subsequent Rows
- Row 2: Skip the first stitch (the one directly below your chain 2), then work 1 hdc into each stitch across the row.
- At the end of the row, chain 2 and turn.
- Repeat Row 2 until your new panel is the same length as the blanket edge you marked in Step 1. This is your "panel."
Step 5: Attaching the Panel (The Magic Seam)
This is where the Evergreen Expansion technique shines. We'll use a slip stitch join as you go method to create a flat, flexible, and nearly invisible seam.
- Place your new panel right side up next to the blanket edge, aligning the stitches.
- Insert your hook through the first stitch of the blanket edge and the first stitch of the panel simultaneously.
- Yarn over and pull through both loops on your hook. This is a slip stitch (sl st).
- Continue across the entire edge, working a slip stitch in each corresponding stitch pair. Pro tip: Keep your tension relaxed to avoid puckering. The seam should lie flat and allow the fabric to drape naturally.
- Fasten off and weave in the yarn end.
Step 6: Adding the Leaf Stitch Border
Now for the decorative flourish! This border transforms the plain edge into a forest-inspired work of art.
- Attach your sage green yarn to one corner of the newly added side.
- Start: Work 1 single crochet (sc) into the first stitch.
- Leaf Cluster: *Skip 2 stitches, then work 5 double crochet (dc) into the next stitch. This creates a "leaf cluster."
- Skip 2 stitches, then work 1 sc into the next stitch.*
- Repeat from * to * across the entire edge.
- At the end, fasten off and weave in all ends securely.
Step 7: Finishing & Blocking
- Weave in all ends using your yarn needle to ensure a clean finish.
- Block your blanket: This is a crucial step. Lay the blanket flat, mist it with water (or use a steam iron on low, keeping it a few inches above the fabric), and gently shape it to even out the stitches and set the dimensions. Allow it to dry completely.
Customization Tips for Your Evergreen Blanket
Once you've mastered the basic technique, the possibilities are endless!
- Add width to multiple sides: Simply repeat the entire process on each edge of your blanket to create a larger, symmetrical piece.
- Make the border pop: Use a contrasting yarn color, like the cream accent mentioned in the materials, for the leaf border to create a striking focal point.
- Keep it subtle: For a more understated look, use the same yarn color as the blanket for both the panel and the border.
- Experiment with stitches: While this pattern uses hdc, you can adapt the technique to any stitch pattern—try it with double crochet, moss stitch, or even a shell stitch for a different texture.
Your Cozy Masterpiece Awaits
The Evergreen Expansion Crochet Blanket is more than just a project—it's a skill you'll use for years to come. Whether you're rescuing a too-small blanket or adding a personalized touch to a new one, this technique empowers you to create exactly what you envision. The earthy greens and textured leaf border evoke the calm of a forest walk, making this a piece you'll cherish and snuggle under for seasons to come.
So grab your hook, choose your favorite greens, and get ready to expand your crochet horizons. Happy crocheting!


