The Frosted Fern Headband Free Pattern – Knit a Textured Leaf Motif Ear Warmer
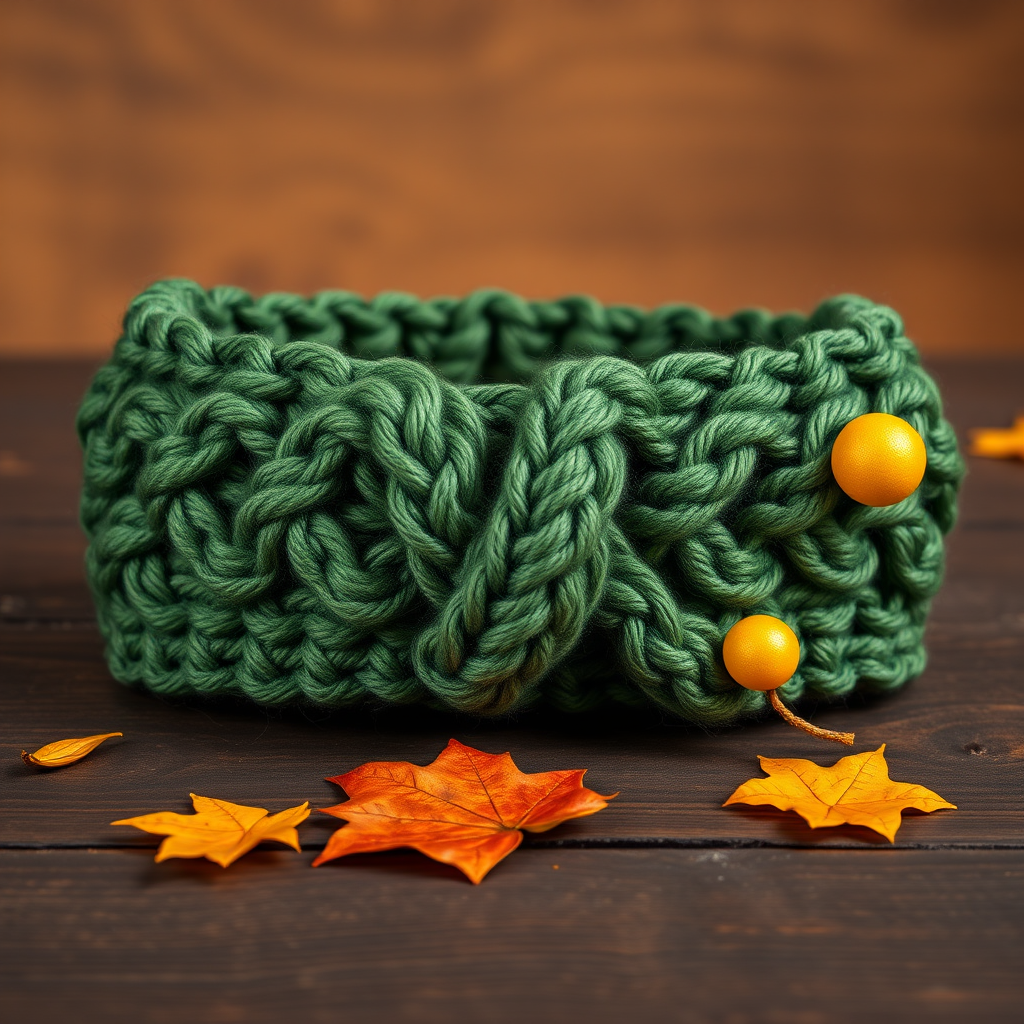
The Frosted Fern Headband: A Free Knitting Pattern for a Textured Leaf Motif Ear Warmer
Wrap yourself in the cozy elegance of a hand-knitted headband that captures the quiet beauty of a frost-kissed forest. The Frosted Fern Headband is a quick, satisfying project that pairs chunky worsted-weight yarn with a delicate leaf-and-berry cable motif. Whether you're braving a chilly autumn commute or simply want a sophisticated accessory for a winter walk, this ear warmer delivers both warmth and woodland charm. Best of all, it's beginner-friendly—if you can knit, purl, and work a simple cable, you can create this stunning piece in just a few evenings.
This pattern is worked flat and seamed at the back, giving it a polished, seamless look once finished. The central leaf cable twists elegantly, flanked by smooth reverse stockinette sections, while optional golden "berry" stitches add a whimsical pop of color at each end. Let's dive into the materials and step-by-step instructions so you can knit your own Frosted Fern Headband.
Materials Needed
Before you begin, gather the following supplies. This project is designed to be approachable, so you likely already have most of these tools in your knitting bag.
- Yarn: Worsted weight yarn (e.g., Lion Brand Wool-Ease) in a deep forest green (MC) for the main body, plus a small amount of warm gold (CC) for the berry accents. Approximately 100–120 yards of MC and 10 yards of CC.
- Needles: US 8 (5.0 mm) knitting needles. You'll also need a cable needle (or a spare double-pointed needle) for the cable twists.
- Notions: Tapestry needle for weaving in ends and seaming, stitch markers (optional), and a measuring tape.
- Gauge: 18 stitches and 24 rows = 4 inches in stockinette stitch. Always check your gauge to ensure the headband fits comfortably.
Step-by-Step Instructions
This headband is knitted flat in one piece, then seamed at the back. The pattern uses a simple 8-row repeat that's easy to memorize. Follow along carefully, and you'll have a beautiful, textured ear warmer in no time.
Abbreviations
- K = knit
- P = purl
- C4F = slip 2 stitches to cable needle, hold in front, knit 2, knit 2 from cable needle
- C4B = slip 2 stitches to cable needle, hold in back, knit 2, knit 2 from cable needle
- MB (make berry) = (k1, p1, k1, p1, k1) all into the same stitch, then pass the 2nd, 3rd, 4th, and 5th stitches over the 1st stitch
- K2tog = knit two together (decrease)
- SSK = slip, slip, knit (decrease)
Getting Started
Cast on 22 stitches with your main color (MC). Leave a tail of about 6 inches for weaving in later. You'll be working back and forth in rows, so a straight needle or circular needle (used flat) both work fine.
The Main Pattern
Work the following 8-row repeat until your headband measures approximately 18 inches (or your desired length, minus 1 inch for seam allowance). Always end with a wrong-side (WS) row before moving to the border.
Row 1 (RS): K2, P2, K1, P2, C4F, P2, K1, P2, K2, P2, K2
Tip: The C4F creates the left-leaning twist of your leaf cable. Hold the cable needle to the front of your work.
Row 2 (WS): P2, K2, P1, K2, P4, K2, P1, K2, P2, K2, P2
This row sets the reverse stockinette background. Keep your purl and knit stitches consistent with Row 1.
Row 3: K2, P2, K1, P2, K4, P2, K1, P2, K2, P2, K2
No cable on this row—just knit the 4 center stitches to let the cable relax.
Row 4: P2, K2, P1, K2, P4, K2, P1, K2, P2, K2, P2
Same as Row 2; the pattern is symmetrical.
Row 5: K2, P2, K1, P2, C4B, P2, K1, P2, K2, P2, K2
Now the cable twists the opposite way. Hold the cable needle to the back of your work for C4B.
Row 6: P2, K2, P1, K2, P4, K2, P1, K2, P2, K2, P2
Continue the established rhythm.
Row 7: K2, P2, K1, P2, K4, P2, K1, P2, K2, P2, K2
Another plain row to balance the cable.
Row 8: P2, K2, P1, K2, P4, K2, P1, K2, P2, K2, P2
Repeat Rows 1–8 until you reach your desired length.
Adding the Berry Border (Optional but Charming)
Once your main body is complete and you've ended with a WS row, you can add a playful berry accent at the end. This creates a lovely contrast against the deep green.
Row 1 (RS): K2, P2, K1, P2, MB, P2, K1, P2, K2, P2, K2
To make the berry (MB): knit into the same stitch 5 times (k1, p1, k1, p1, k1), then pass the 2nd, 3rd, 4th, and 5th stitches over the 1st. This creates a small, round bobble.
Row 2 (WS): P2, K2, P1, K2, P4, K2, P1, K2, P2, K2, P2
Work the purl and knit stitches as they appear.
Row 3: K2, P2, K1, P2, K4, P2, K1, P2, K2, P2, K2
Plain row to settle the berry.
Row 4: P2, K2, P1, K2, P4, K2, P1, K2, P2, K2, P2
Finish the border section.
Bind off loosely in pattern. This means knit the knit stitches and purl the purl stitches as you bind off, keeping the edge stretchy so the headband fits comfortably over your ears.
Finishing Touches
Now it's time to turn your flat piece into a cozy headband.
- Fold and seam: Fold the headband in half with the right sides (RS) together, matching the short ends. Use a mattress stitch to seam the edges closed. This creates an invisible, professional-looking join.
- Turn right side out: Carefully turn the headband so the right side faces out. Gently shape the cable and berries with your fingers.
- Weave in ends: Use your tapestry needle to weave in all loose yarn tails securely, both at the cast-on and bind-off edges.
- Block gently: To enhance the cable definition and even out the stitches, lightly steam block or wet block the headband. Lay it flat to dry, shaping it to the correct circumference.
And that's it! Your Frosted Fern Headband is ready to wear. The rich texture and earthy tones make it a versatile accessory that pairs beautifully with autumn coats or winter sweaters. Plus, it makes a thoughtful handmade gift for friends and family who love nature-inspired style.
Happy knitting, and may your days be filled with cozy stitches and woodland wonder!



