The Gilded Fern Crochet Wrap Free Pattern – A Botanical Lace Stole
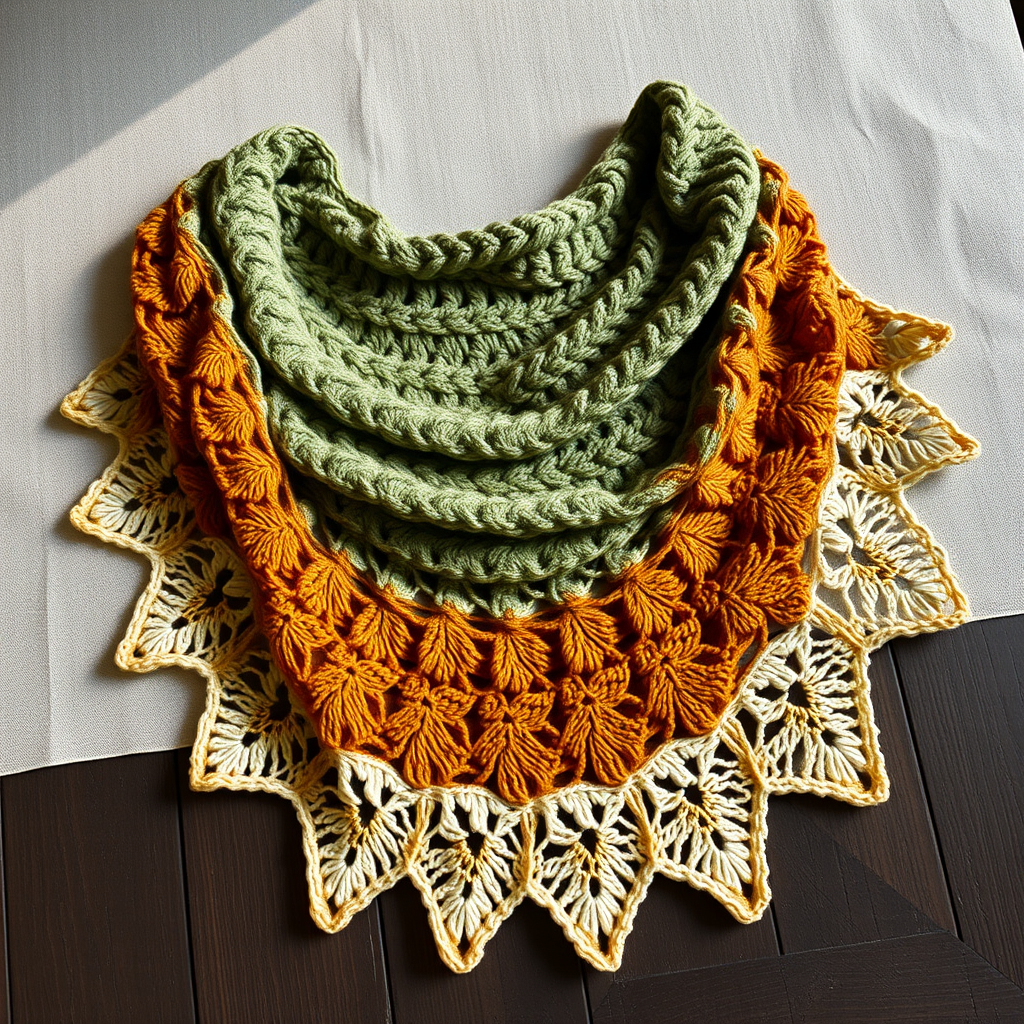
The Gilded Fern Crochet Wrap: A Botanical Lace Stole Pattern
Wrap yourself in the elegance of a cascading fern garden with this crocheted lace shawl, where textured leaf motifs bloom across a soft, golden gradient. This pattern offers a meditative, rhythmic stitch sequence that builds into a luxurious, airy accessory. Whether you're a seasoned crocheter or an adventurous beginner, this wrap is a delightful project that combines simple stitches with a stunning botanical aesthetic. The result is a one-of-a-kind, handmade piece that evokes the warmth of a sunlit forest floor.
Materials Needed
Before you begin, gather the following supplies to ensure a smooth and enjoyable crocheting experience. The quality of your materials will directly impact the drape and beauty of your finished wrap.
- Yarn: Fingering weight yarn in a gradient set of 5 colors (e.g., sage green, moss, amber, honey, cream) – approximately 800 yards total. A wool blend is recommended for its elasticity and blocking properties.
- Hook: US G/6 (4.0 mm) crochet hook. Ensure your hook is comfortable to hold for extended periods.
- Other Tools: Yarn needle for weaving in ends, scissors, stitch markers (optional but helpful), and a blocking mat with pins for the final finishing step.
Gauge: 4 pattern repeats (12 dc) and 6 rows = 4 inches in basic dc. While gauge is important for size, this wrap is forgiving; a slightly looser or tighter tension will simply alter the final dimensions slightly.
Step-by-Step Instructions
This wrap is worked from the top center down, increasing at both edges to form a triangle. The pattern alternates between solid rows and leaf motif rows, creating a beautiful, organic rhythm. Follow these detailed instructions carefully, and you'll be amazed at what you create.
Getting Started: The Foundation
We'll begin with a magic ring, which creates a tight, adjustable center point for your shawl.
- Magic Ring: Make a magic ring. If you're unfamiliar with this technique, wrap the yarn around your fingers twice, insert your hook, and pull up a loop. Chain 1 to secure.
- Foundation Row: Ch 4 (counts as dc + ch1), 2 dc in ring, ch 1, dc in ring. Pull the tail to close the ring tightly. Turn your work. (You now have 3 dc and 2 ch-1 spaces)
Building the Shape: Rows 1-2
These rows establish the increase pattern that will form the triangle shape of your wrap.
- Row 1: Ch 3 (counts as dc), 2 dc in first ch-1 space, ch 1, dc in next dc, ch 1, 3 dc in last ch-1 space, dc in top of turning ch. Turn. (Now 7 dc and 2 ch-1 spaces)
- Row 2: Ch 3, 2 dc in first dc, *ch 1, skip next dc, dc in next dc* repeat across to last dc, 2 dc in last dc, dc in top of turning ch. Turn. (This increases 2 dc on each side, maintaining the shape)
Introducing the Leaf Motif: Rows 3-5
This is where the magic happens! The leaf motif creates the botanical lace pattern that defines this shawl.
- Row 3 (Leaf motif start): Ch 3, 2 dc in first dc, ch 2, skip 2 dc, sc in next dc, ch 2, skip 2 dc, dc in next dc, ch 2, skip 2 dc, sc in next dc, ch 2, skip 2 dc, 2 dc in last dc, dc in top of turning ch. Turn. (You've created the framework for your leaf)
- Row 4: Ch 3, 2 dc in first dc, ch 1, dc in ch-2 space, ch 1, dc in sc, ch 1, dc in ch-2 space, ch 1, dc in dc, ch 1, dc in ch-2 space, ch 1, dc in sc, ch 1, dc in ch-2 space, ch 1, 2 dc in last dc, dc in top of turning ch. Turn. (This fills in the leaf shape with a delicate mesh)
- Row 5: Ch 3, 2 dc in first dc, *ch 1, skip next dc, dc in next dc* repeat across to last dc, 2 dc in last dc, dc in top of turning ch. Turn. (This returns to a solid row, securing the leaf motif)
Continuing the Pattern: Rows 6-10
Now we'll continue building, adding a center leaf motif to create the staggered fern effect.
- Rows 6-7: Repeat Row 2. This gives you two solid rows to create space between motifs.
- Row 8 (Center Leaf): Ch 3, 2 dc in first dc, work 8 dc across, then (dc, ch 2, dc) in the same stitch, continue dc to the last dc, 2 dc in last dc, dc in top of turning ch. Turn. This creates a small leaf shape in the center of the wrap.
- Rows 9-10: Repeat Row 2. These solid rows allow the leaf to stand out.
Maintaining the Rhythm: The Full Pattern
Now that you understand the basic structure, here's how to continue:
- Alternate Pattern: Alternate between solid rows (Row 2) and leaf motif rows (Rows 3-4) every 6 rows. This means you'll work 4 solid rows, then a leaf motif row, then a fill-in row, then more solid rows.
- Stagger the Leaves: As you increase, place the leaf motifs at staggered intervals. For example, on the first motif, place it in the center. On the next motif, place it slightly off-center. This mimics the natural, organic growth of a fern frond.
Color Changes: The Gradient Effect
The gradient is what makes this shawl truly special. Follow this sequence for a beautiful, natural transition.
- Color Sequence: Change colors every 20 rows, following the gradient sequence: sage green, moss, amber, honey, cream.
- How to Change: To change color seamlessly, work the last dc of the row with the new color. When you have two loops left on your hook, yarn over with the new color and pull through the final loop. This creates a clean, invisible join.
Finishing Touches: Edging and Blocking
Once you've reached your desired size (approximately 60 inches wide), it's time to finish your masterpiece.
- Scalloped Edging: Work a scalloped edge around all sides: *sc in next dc, skip 1 dc, 5 dc in next dc, skip 1 dc* repeat around all edges. This creates a delicate, feminine border that complements the lace pattern.
- Fasten Off: Cut your yarn, leaving a 6-inch tail. Pull through the last loop and weave in all ends with your yarn needle. Take your time with this step to ensure a professional finish.
- Blocking (Crucial Step): Soak the wrap in lukewarm water with a drop of wool wash for 15-20 minutes. Gently squeeze out excess water (never wring!). Lay the wrap on a blocking mat and pin it to shape, stretching it gently to open up the lace pattern. Allow it to dry completely, which may take 24-48 hours. This step is essential for the lace to truly shine.
Congratulations! You've created a stunning, heirloom-quality piece that you'll treasure for years. The Gilded Fern Crochet Wrap is perfect for cool evenings, special occasions, or as a thoughtful handmade gift. The rhythmic pattern is as enjoyable to create as it is beautiful to wear. Happy crocheting!


