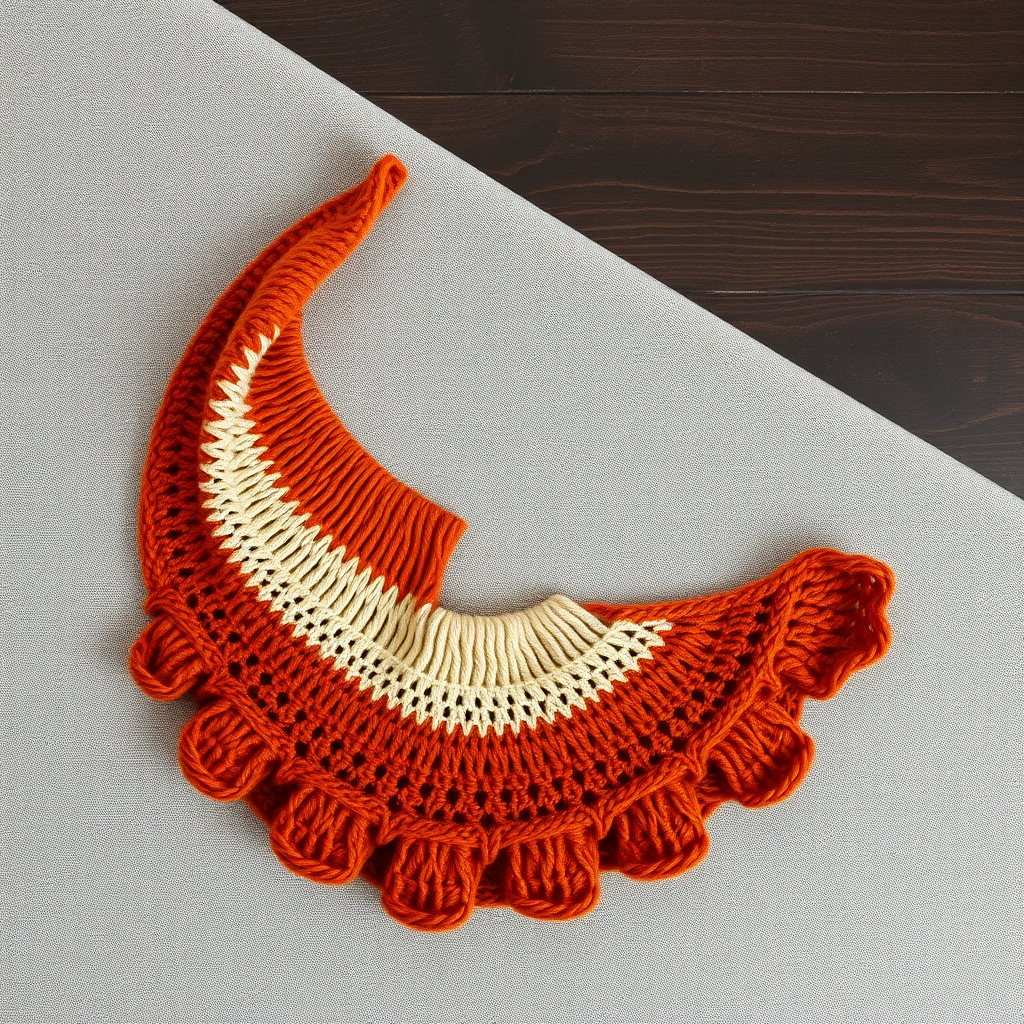
The Harvest Moon Crescent Shawl: A Free Knitting Pattern for a Textured, Asymmetrical Wrap

Wrap Yourself in Autumn Elegance: The Harvest Moon Crescent Shawl
Embrace the cozy charm of the season with the Harvest Moon Crescent Shawl, a modern, asymmetrical wrap that combines rich texture with a graceful silhouette. This free knitting pattern is designed to be both stylish and accessible, featuring a beautiful interplay of knit and purl stitches that create a woven-like fabric. Whether you're curling up by the fire or stepping out on a crisp evening, this shawl offers the perfect blend of warmth and sophistication. The crescent shape is achieved through strategic increases and decreases, resulting in a stunning accessory that drapes elegantly over your shoulders.
Materials Needed
Before you begin, gather the following supplies to ensure a smooth and enjoyable knitting experience.
- Yarn: Caron Simply Soft (100% acrylic; 315 yds / 170g per skein)
- Main Color (MC): 'Autumn Red' – 2 skeins
- Contrast Color (CC): 'Soft Pink' – 1 skein
- Needles: US Size 9 (5.5 mm) circular knitting needles, 32-inch or longer (to accommodate the growing number of stitches)
- Notions: Yarn needle for weaving in ends, stitch markers (optional), blocking pins and mats
- Gauge: 18 stitches and 24 rows = 4 inches in Stockinette stitch (blocked). Tip: Always check your gauge to ensure your finished shawl matches the intended size and drape.
Step-by-Step Instructions
This pattern is worked from the top center point down to the bottom edge. The crescent shape is created by increasing stitches on one side (the curved edge) while keeping the other side straight. Follow these detailed instructions carefully, and you'll have a beautiful shawl in no time.
Notes for Success
- Edge Stitch: Slip the first stitch of every row purlwise with yarn in front (wyif). This creates a neat, braided edge along the top of the shawl.
- Shaping: The pattern uses kfb (knit front and back) to increase and ssk (slip slip knit) to decrease. These are worked on right-side (RS) rows only.
- Reading the Pattern: The stitch count will increase by 1 stitch every 2 rows (every RS row). The texture pattern repeats every 10 rows.
Getting Started: The Foundation
With MC, cast on 3 stitches.
- Row 1 (WS): Slip 1 wyif, k2.
- Row 2 (RS): Slip 1 wyif, kfb, k1. (4 stitches)
- Row 3: Slip 1 wyif, p to last stitch, k1.
- Row 4: Slip 1 wyif, kfb, k to last 2 stitches, ssk. (4 stitches)
- Row 5: Slip 1 wyif, p to last stitch, k1.
- Row 6: Slip 1 wyif, kfb, k to last 2 stitches, ssk. (5 stitches)
- Row 7: Slip 1 wyif, p to last stitch, k1.
- Row 8: Slip 1 wyif, kfb, k to last 2 stitches, ssk. (6 stitches)
- Row 9: Slip 1 wyif, p to last stitch, k1.
- Row 10: Slip 1 wyif, kfb, k to last 2 stitches, ssk. (7 stitches)
Begin the Texture Pattern
Now you'll start the 10-row texture pattern. Continue to slip the first stitch wyif on every row. The pattern alternates between knit and purl stitches to create the woven look.
- Row 11 (WS): Slip 1 wyif, p1, k1, p1, k1, p1, k1.
- Row 12 (RS): Slip 1 wyif, kfb, k1, p1, k1, p1, ssk. (7 stitches)
- Row 13: Slip 1 wyif, p1, k1, p1, k1, p1, k1.
- Row 14: Slip 1 wyif, kfb, p1, k1, p1, k1, ssk. (8 stitches)
- Row 15: Slip 1 wyif, p1, k1, p1, k1, p1, k1, p1.
- Row 16: Slip 1 wyif, kfb, k1, p1, k1, p1, k1, ssk. (8 stitches)
- Row 17: Slip 1 wyif, p1, k1, p1, k1, p1, k1, p1.
- Row 18: Slip 1 wyif, kfb, p1, k1, p1, k1, p1, ssk. (9 stitches)
- Row 19: Slip 1 wyif, p1, k1, p1, k1, p1, k1, p1, k1.
- Row 20: Slip 1 wyif, kfb, k1, p1, k1, p1, k1, p1, ssk. (9 stitches)
Continuing the Pattern
Repeat the 10-row texture pattern (Rows 11-20) throughout the rest of the shawl. On every RS row, you will:
- Increase: Work a kfb in the second stitch (after slipping the first stitch).
- Decrease: Work an ssk at the end of the row (knit to the last 2 stitches, then ssk).
Color Transition
When the shawl measures approximately 30 inches along the straight edge, begin the color transition:
- Work 2 rows with MC, then 2 rows with CC.
- Repeat this 2-row stripe pattern until the shawl reaches the full 60-inch length.
- For the final 10 rows, use only CC to create a soft pink border.
Finishing Touches
- Bind Off: On the next RS row, bind off loosely in pattern (knit the knits and purl the purls as they appear). This ensures the edge remains stretchy and matches the fabric.
- Weave in Ends: Use a yarn needle to weave in all loose ends securely on the wrong side.
- Blocking: Block the shawl to shape. Soak it in lukewarm water, gently squeeze out excess water (do not wring), and lay it flat on a blocking mat. Pin out the points along the curved edge to accentuate the crescent shape. Allow it to dry completely. This step is crucial for the shawl to achieve its beautiful drape and defined texture.
Your Harvest Moon Crescent Shawl is now complete! Enjoy the warmth and elegance of this handcrafted accessory, perfect for adding a touch of autumn charm to any outfit.