The Jolly Stroll Knitted Santa Slippers Free Pattern – A Cozy Holiday Classic with Pom-Pom Accents
The Jolly Stroll Knitted Santa Slippers Free Pattern – A Cozy Holiday Classic with Pom-Pom Accents
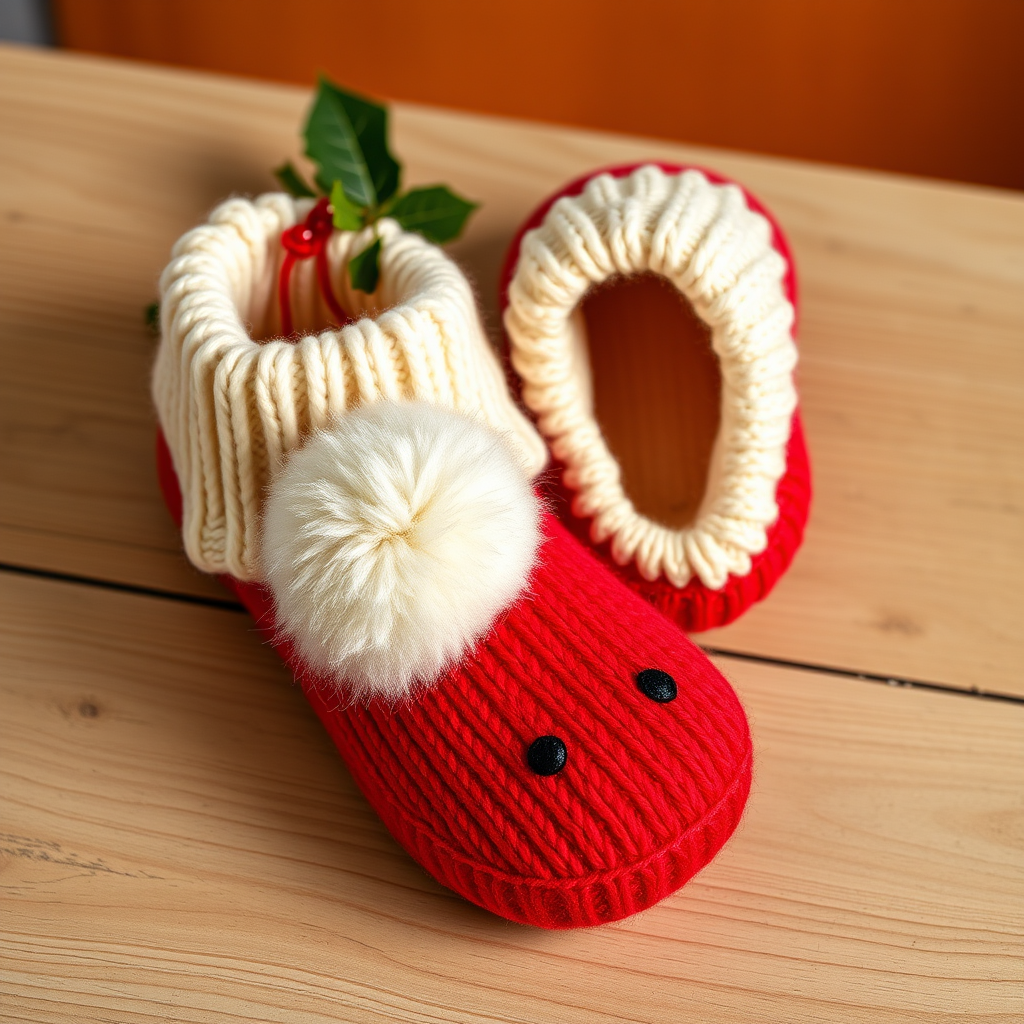
Wrap your feet in festive cheer with these hand-knitted Santa slippers, featuring a plush red body, fluffy white trim, and a jolly pom-pom toe. This pattern is perfect for intermediate knitters looking to create a whimsical, wearable holiday gift. Whether you're crafting for yourself or surprising a loved one, these slippers bring warmth, charm, and a touch of Christmas magic to every step.
With their bright cherry red color, soft white ribbed cuff, and playful pom-pom accents, these slippers are as delightful to make as they are to wear. The pattern is straightforward, uses basic knitting techniques, and results in a cozy, slightly oversized slipper that feels like a warm hug on a cold winter's night.
Materials Needed
Before you begin, gather the following materials to ensure a smooth and enjoyable knitting experience:
- Yarn: Worsted weight yarn in Red (MC), White (CC), and Black (for eyes) – approximately 200g MC, 100g CC, and a small amount of Black
- Needles: US 7 (4.5 mm) knitting needles (or size needed to obtain gauge)
- Notions: Tapestry needle for finishing, scissors, and a pom-pom maker (or cardboard for making pom-poms by hand)
Gauge: 20 stitches and 28 rows = 4 inches in stockinette stitch. Be sure to check your gauge before starting to ensure your slippers fit perfectly.
Step-by-Step Instructions
Follow these detailed instructions to create your very own pair of Jolly Stroll Santa Slippers. The pattern is written for Women's US 6-8, but you can easily adjust the size by changing needle size or stitch count.
Abbreviations
- K = knit
- P = purl
- K2tog = knit two together (decrease)
- P2tog = purl two together (decrease)
- SSK = slip slip knit (decrease)
- MC = main color (Red)
- CC = contrasting color (White)
Slipper (Make 2)
Cuff
With CC (White), cast on 40 stitches.
Rows 1-10: Work in K1, P1 ribbing. This creates the fluffy white cuff that will hug your ankle. Keep your tension even for a neat, stretchy rib.
Switch to MC (Red).
Foot
Rows 11-20: Work in stockinette stitch (knit on right side, purl on wrong side). This smooth, classic stitch forms the body of the slipper. Continue until you have completed 10 rows of stockinette.
Shape Toe
Now we'll shape the toe with a series of decreases. Work each row carefully, counting your stitches as you go.
Row 21: K8, K2tog, K20, SSK, K8 (36 stitches)
Explanation: Knit 8 stitches, then knit 2 together (decrease), knit 20 stitches, then slip slip knit (decrease), and knit the final 8 stitches. You've decreased 2 stitches total.
Row 22: Purl across.
Row 23: K7, K2tog, K18, SSK, K7 (32 stitches)
Explanation: Knit 7, decrease with K2tog, knit 18, decrease with SSK, knit 7.
Row 24: Purl across.
Row 25: K6, K2tog, K16, SSK, K6 (28 stitches)
Explanation: Knit 6, K2tog, knit 16, SSK, knit 6.
Row 26: Purl across.
Row 27: K5, K2tog, K14, SSK, K5 (24 stitches)
Explanation: Knit 5, K2tog, knit 14, SSK, knit 5.
Row 28: Purl across.
Row 29: K4, K2tog, K12, SSK, K4 (20 stitches)
Explanation: Knit 4, K2tog, knit 12, SSK, knit 4.
Row 30: Purl across.
Row 31: K3, K2tog, K10, SSK, K3 (16 stitches)
Explanation: Knit 3, K2tog, knit 10, SSK, knit 3.
Row 32: Purl across.
Row 33: K2, K2tog, K8, SSK, K2 (12 stitches)
Explanation: Knit 2, K2tog, knit 8, SSK, knit 2.
Row 34: Purl across.
Row 35: K1, K2tog, K6, SSK, K1 (8 stitches)
Explanation: Knit 1, K2tog, knit 6, SSK, knit 1.
Cut yarn, leaving a long tail (about 12 inches). Thread the tail through a tapestry needle, then pass it through the remaining 8 stitches on your needle. Pull tight to gather the toe closed, and secure with a knot.
Seam
Sew the back seam of the slipper from the cuff to the toe using mattress stitch. This invisible seam creates a professional finish and ensures your slipper holds its shape.
Mattress Stitch Tutorial: With right sides facing you, thread your tapestry needle with a length of yarn. Insert the needle under the horizontal bar between the first and second stitch on one side, then under the corresponding bar on the other side. Continue alternating sides, pulling gently to close the seam. This creates a neat, invisible join.
Pom-Pom Toe
Using CC (White), make a 2-inch pom-pom. You can use a pom-pom maker or cut two circles of cardboard with a hole in the center. Wrap yarn around the ring until thick, then cut around the edge and tie tightly in the middle. Trim to shape.
Attach the pom-pom securely to the toe of each slipper using a tapestry needle and matching yarn.
Eyes (Optional)
With Black yarn, embroider two small French knots or duplicate stitches on the toe area above the pom-pom to create a cute Santa face. Position them about 1 inch apart, centered above the pom-pom.
French Knot Tutorial: Bring the needle up through the fabric, wrap the yarn around the needle 2-3 times, then insert the needle back down close to where it came up. Pull gently to form a small knot.
Finishing
Weave in all ends using a tapestry needle. Block gently to shape – this helps even out your stitches and gives the slippers a polished look. To block, dampen the slippers and lay them flat to dry, shaping them as they dry.
Tips for Perfect Slippers
- Check your gauge: Knitting too loosely or tightly will change the size of your slippers. Always swatch first!
- Use stitch markers: Place markers at the decrease points to help you keep track of your rows.
- Make them your own: Experiment with different colors or add a leather sole for extra durability.
These Jolly Stroll Santa Slippers are the perfect holiday project – fun to knit, delightful to gift, and guaranteed to bring smiles. Whether you're curling up by the fire or dancing around the Christmas tree, your feet will thank you for this festive treat. Happy knitting!


