The Sunburst Shell Towel Topper: A Free Knitting Pattern for a Textured, Beachy Kitchen Accent
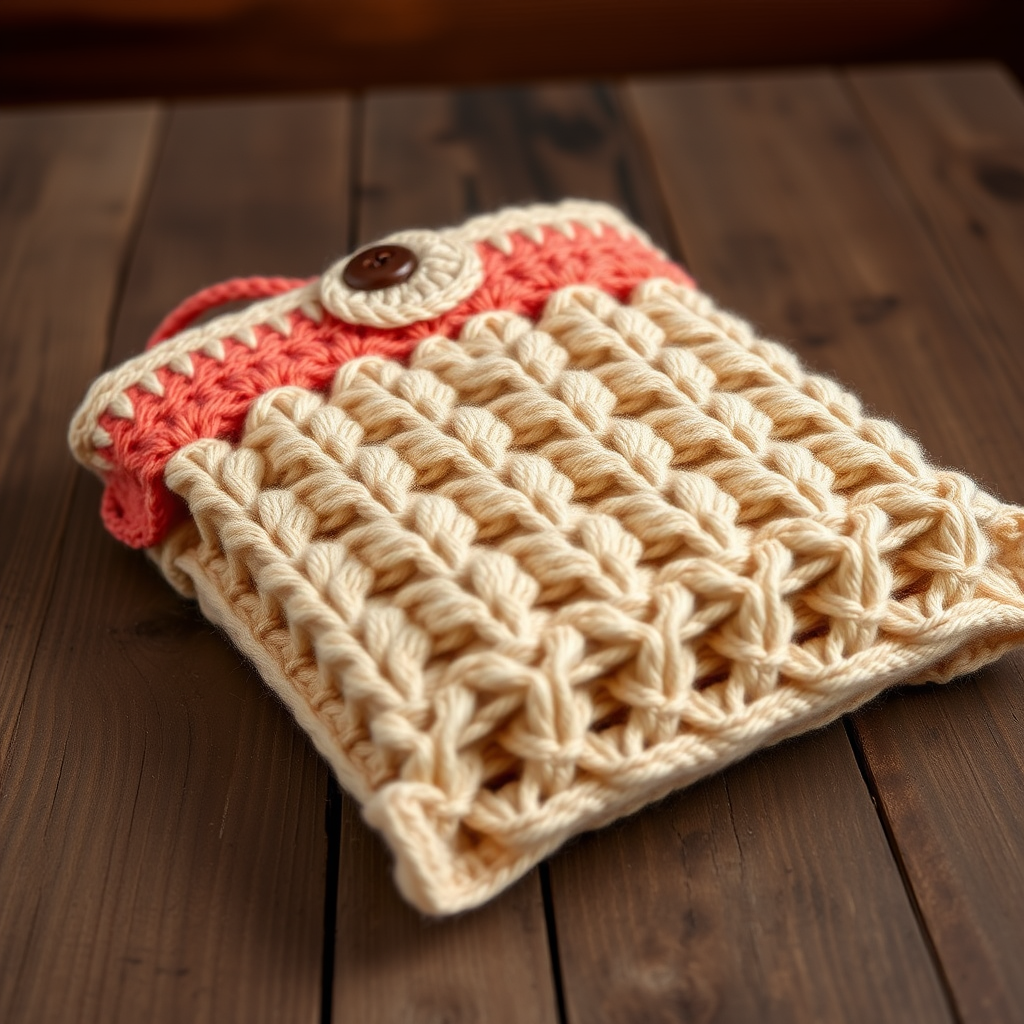
Bring Coastal Charm to Your Kitchen with the Sunburst Shell Towel Topper
Are you ready to add a touch of beachy elegance to your kitchen or guest bath? The Sunburst Shell Towel Topper is a quick, beginner-friendly knitting project that transforms simple cotton yarn into a textured, scalloped masterpiece. Featuring a radiant shell stitch pattern and a built-in button loop, this topper is designed to hang beautifully from any oven handle or cabinet knob. The warm sand and coral color combination evokes sunny seaside vibes, making it the perfect accent for coastal decor or a thoughtful handmade gift. Let’s dive into this free pattern and create something truly special.
Materials Needed
Before you begin, gather the following supplies. Using the exact materials ensures your finished topper matches the gauge and texture shown in the photos.
- Yarn: Worsted weight cotton yarn (e.g., Lily Sugar 'n Cream) in two colors:
- Main Color (MC) - Sand: approx. 100 yards
- Contrast Color (CC) - Coral: approx. 50 yards
- Needles & Tools:
- US Size 7 (4.5 mm) knitting needles
- Tapestry needle for weaving ends
- Stitch marker (optional, for counting rows)
- One 1-inch button (for securing the towel)
- Gauge: 20 stitches x 26 rows = 4 inches in stockinette stitch. Always check your gauge for best results.
Step-by-Step Instructions
This pattern is worked flat from the bottom edge upward. The shell stitch creates a beautiful scalloped edge. Read through all instructions before starting.
Abbreviations
- CO: Cast on
- K: Knit
- P: Purl
- K2tog: Knit two together (decrease)
- YO: Yarn over (increase)
- St(s): Stitch(es)
- RS: Right side
- WS: Wrong side
- MC: Main Color (Sand)
- CC: Contrast Color (Coral)
Knitting the Topper Body
With MC, CO 30 sts.
Rows 1-4 (Foundation):
- Row 1 (RS): K all sts.
- Row 2 (WS): P all sts.
- Row 3: K all sts.
- Row 4: P all sts.
Row 5 (Shell Row - RS): K1, *K2tog, YO, K1, YO, K2tog, K1; repeat from * to last st, K1. (You will have 5 shell repeats of 5 sts each, plus 2 edge sts = 30 sts total)
Rows 6-10 (Stockinette Section):
- Row 6: P all sts.
- Row 7: K all sts.
- Row 8: P all sts.
- Row 9: K all sts.
- Row 10: P all sts.
Row 11 (Shell Row - RS): Repeat Row 5.
Rows 12-16 (Stockinette Section):
- Row 12: P all sts.
- Row 13: K all sts.
- Row 14: P all sts.
- Row 15: K all sts.
- Row 16: P all sts.
Row 17 (Shell Row - RS): Repeat Row 5.
Rows 18-22 (Stockinette Section):
- Row 18: P all sts.
- Row 19: K all sts.
- Row 20: P all sts.
- Row 21: K all sts.
- Row 22: P all sts.
Row 23 (Shell Row - RS): Repeat Row 5.
Rows 24-28 (Stockinette Section):
- Row 24: P all sts.
- Row 25: K all sts.
- Row 26: P all sts.
- Row 27: K all sts.
- Row 28: P all sts.
Row 29 (Shell Row - RS): Repeat Row 5.
Rows 30-34 (Stockinette Section):
- Row 30: P all sts.
- Row 31: K all sts.
- Row 32: P all sts.
- Row 33: K all sts.
- Row 34: P all sts.
Row 35 (Shell Row - RS): Repeat Row 5.
Rows 36-40 (Stockinette Section):
- Row 36: P all sts.
- Row 37: K all sts.
- Row 38: P all sts.
- Row 39: K all sts.
- Row 40: P all sts.
Buttonhole and Top Edge
Buttonhole Row (RS): K2, K2tog, YO, K to last 4 sts, YO, K2tog, K2. (This creates a buttonhole centered on the row.)
Next Row (WS): P all sts.
Next Row: K all sts.
Next Row: P all sts.
Bind off loosely in knit. Tip: Use a larger needle or a stretchy bind-off to keep the edge flexible.
Finishing
- Weave in ends: Use a tapestry needle to carefully weave in all yarn tails on the wrong side of the work.
- Create the hanging loop: With CC (Coral), make a twisted cord or chain stitch loop approximately 4 inches long. Attach it securely to the top center of the topper (the bind-off edge). This loop will hang over a hook or knob.
- Attach the button: Sew the 1-inch button to the opposite side of the topper, aligning it with the buttonhole. This button will secure the topper around a towel.
- Block (optional): Lightly block the topper by misting with water and laying flat to dry. This helps even out the stitches and define the shell pattern.
Your Sunburst Shell Towel Topper is now ready to hang! Simply fold a hand towel over the top edge, button it in place, and enjoy the textured, beachy charm it brings to your space. Happy knitting!



