The Whimsical Woodland Bunny Hat Free Pattern – Crochet a Cozy Messy Bun Beanie with Appliqué Ears
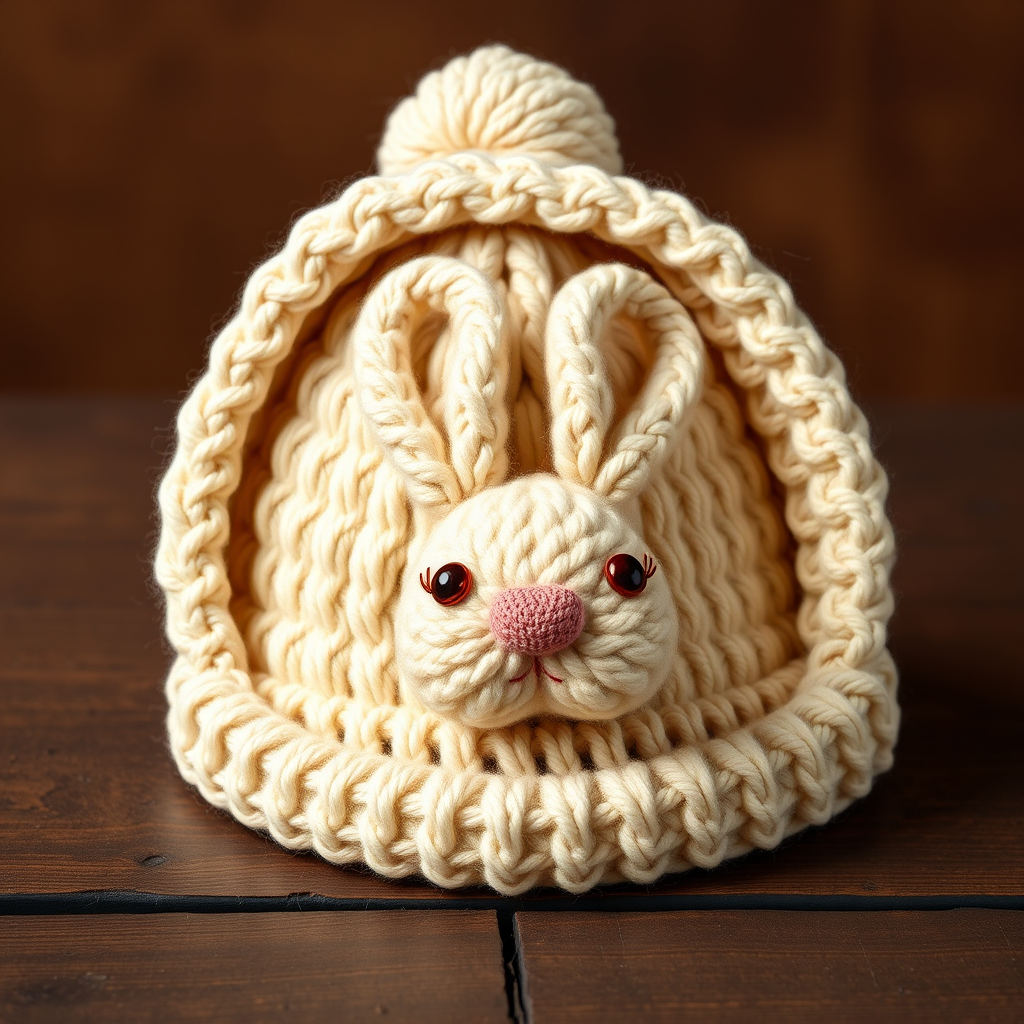
The Whimsical Woodland Bunny Hat Free Pattern – Crochet a Cozy Messy Bun Beanie with Appliqué Ears
There’s something truly magical about a handcrafted hat that combines warmth with a touch of woodland whimsy. This charming crochet pattern features a ribbed texture that hugs the head comfortably, a clever messy bun opening for those busy days, and an adorable bunny appliqué that adds a playful, storybook charm. Whether you're crafting for a chilly autumn walk, a cozy winter photoshoot, or simply to gift a loved one something made with heart, this hat is both functional and utterly delightful. Let’s pick up your hook and bring this little bunny to life!
Materials Needed
Before we dive into the stitches, let’s gather everything you’ll need. This project is beginner-friendly and uses simple supplies:
- Yarn: Worsted weight yarn in three colors – cream (for the main hat and bunny), soft brown (for embroidered details), and blush pink (for the nose and inner ears). You’ll need approximately 200g total.
- Hook: 5.5mm crochet hook (US I-9).
- Notions: A yarn needle for weaving in ends and sewing the appliqué, plus a pair of scissors.
- Gauge: 14 single crochets (sc) x 16 rows = 4 inches in the ribbed pattern. Tip: Always check your gauge to ensure a perfect fit!
Step-by-Step Instructions
This pattern is worked in continuous rounds for the hat body, then we’ll create the bunny appliqué separately and sew it on. Let’s break it down into manageable steps.
Part 1: The Hat Body (Worked from the Bottom Up)
We’ll start with a magic ring and increase gradually to create a flat circle that forms the top of the hat.
- Round 1: Make a magic ring, chain 1, and work 8 single crochets (sc) into the ring. Pull the tail to tighten the ring, then slip stitch (sl st) to join. (8 stitches)
- Round 2: Chain 1, work 2 sc in each stitch around, sl st to join. (16 stitches)
- Round 3: Chain 1, *sc in the next stitch, 2 sc in the next stitch*; repeat from * to * around, sl st to join. (24 stitches)
- Round 4: Chain 1, *sc in the next 2 stitches, 2 sc in the next stitch*; repeat around, sl st to join. (32 stitches)
- Round 5: Chain 1, *sc in the next 3 stitches, 2 sc in the next stitch*; repeat around, sl st to join. (40 stitches)
- Round 6: Chain 1, *sc in the next 4 stitches, 2 sc in the next stitch*; repeat around, sl st to join. (48 stitches)
- Round 7: Chain 1, *sc in the next 5 stitches, 2 sc in the next stitch*; repeat around, sl st to join. (56 stitches)
- Round 8: Chain 1, *sc in the next 6 stitches, 2 sc in the next stitch*; repeat around, sl st to join. (64 stitches)
- Round 9: Chain 1, *sc in the next 7 stitches, 2 sc in the next stitch*; repeat around, sl st to join. (72 stitches)
- Round 10: Chain 1, *sc in the next 8 stitches, 2 sc in the next stitch*; repeat around, sl st to join. (80 stitches)
- Round 11: Chain 1, sc in each stitch around, sl st to join. (80 stitches)
- Rounds 12-? (The Body): Repeat Round 11 until the hat measures 6 inches from the center top. This creates the smooth, snug fit of the beanie.
Part 2: Creating the Messy Bun Opening
This is the clever part that makes this hat perfect for ponytails or buns!
- Bun Opening Round: Chain 1, sc in the next 20 stitches, then chain 40 loosely (this will be the opening for your bun), skip the next 40 stitches, and sc in the remaining 20 stitches. Sl st to join. (You will have 40 sc + 40 ch = 80 stitches total).
- Next Round: Chain 1, sc in each sc and each chain around. This means you’ll work 1 sc into each of the 40 sc stitches and 1 sc into each of the 40 chain spaces. Sl st to join. (80 stitches)
Part 3: The Ribbed Brim
Now we’ll add that lovely, stretchy ribbed texture that makes the hat hug your head perfectly.
- Brim Rows: Chain 1, *working in the back loops only, sc in each stitch around*; repeat this for a total of 3 rows. The back-loop-only technique creates the raised ribbed effect. After the third row, fasten off and weave in your ends securely.
Part 4: The Bunny Appliqué (Make 2 Ears and 1 Face)
Now for the star of the show – the adorable bunny! We’ll make the ears first, then the face.
Bunny Ears (Make 2)
- With cream yarn, chain 10.
- Row 1: Sc in the 2nd chain from the hook and in each chain across. (9 stitches)
- Row 2: Chain 1, turn. Sc2tog (single crochet two together), sc in the next 5 stitches, sc2tog. (7 stitches)
- Row 3: Chain 1, turn. Sc2tog, sc in the next 3 stitches, sc2tog. (5 stitches)
- Row 4: Chain 1, turn. Sc2tog, sc in the next 1 stitch, sc2tog. (3 stitches)
- Row 5: Chain 1, turn. Sc3tog (single crochet three together). Fasten off, leaving a long tail for sewing.
- Detail: With blush pink yarn, embroider a small inner ear using a simple straight stitch. This adds that sweet, delicate touch.
Bunny Face
- With cream yarn, make a magic ring, chain 1, and work 6 sc into the ring. Pull tight and sl st to join. (6 stitches)
- Round 2: Chain 1, 2 sc in each stitch around, sl st to join. (12 stitches)
- Round 3: Chain 1, *sc in the next stitch, 2 sc in the next stitch*; repeat around, sl st to join. (18 stitches)
- Round 4: Chain 1, sc in each stitch around, sl st to join. Fasten off, leaving a long tail for sewing.
- Details: With soft brown yarn, embroider two small eyes using a satin stitch. Then, with blush pink yarn, embroider a tiny nose just below the eyes. This gives the bunny its sweet, expressive face.
Part 5: Assembly – Bringing It All Together
- Sew the Ears: Position the two ears on the top of the face piece, slightly angled outward for that floppy, whimsical look. Sew them securely using the long tails you left.
- Attach the Face: Place the completed bunny face onto the front of the hat, just above the ribbed brim. Center it nicely and sew it on securely with the yarn needle, making sure your stitches are hidden within the appliqué.
- Final Touches: Weave in all remaining ends carefully. Give your hat a gentle steam block if desired, to smooth out the stitches and help the bunny ears stand up nicely.
And there you have it – your very own Whimsical Woodland Bunny Hat! This pattern is a joy to make, and the result is a cozy, charming accessory that’s sure to become a favorite. Whether you keep it for yourself or gift it to a fellow craft lover, this hat is a beautiful blend of comfort and creativity. Happy crocheting!


