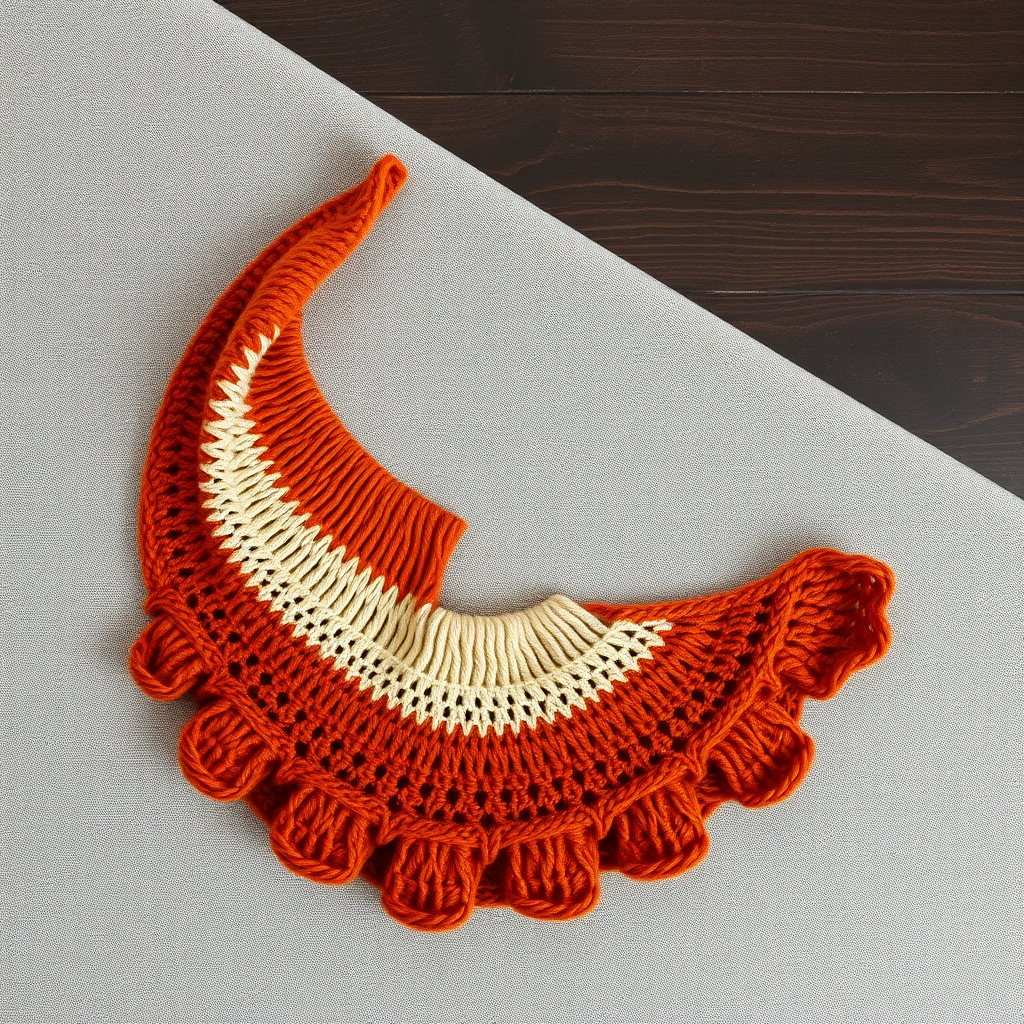
The Whispering Willow Lace Shawl Free Pattern – A Knitted Crescent Wrap with Leaf and Vine Motifs

The Whispering Willow Lace Shawl: A Free Knitting Pattern for a Crescent Wrap with Leaf & Vine Motifs
Wrap yourself in the gentle elegance of a crescent-shaped shawl that drapes like a soft whisper of spring. The Whispering Willow Lace Shawl is a stunning knitted accessory featuring delicate leaf and vine motifs that grow organically from a garter stitch base. Perfect for cool evenings, special occasions, or as a thoughtful handmade gift, this pattern combines botanical beauty with a flattering crescent silhouette. Whether you choose a soft sage green or dusty rose, this shawl will become a treasured piece in your wardrobe.
This free pattern is designed for knitters who have mastered basic lace techniques and are ready to tackle a rewarding project. The combination of written instructions and clear structure makes it accessible, while the intricate-looking motifs are surprisingly simple once you get into the rhythm. Let's dive into creating this botanical masterpiece!
Materials Needed
Before you begin, gather the following supplies to ensure a smooth knitting experience:
- Yarn: Fingering weight yarn (approx. 400–450 yards), such as a merino-silk blend in a soft sage green or dusty rose. The silk content adds a beautiful drape and subtle sheen that enhances the lace pattern.
- Needle: US 6 (4.0 mm) circular knitting needle, 32-inch or longer. The long circular needle is essential to accommodate the growing number of stitches as the shawl expands.
- Gauge: 20 stitches and 28 rows = 4 inches in stockinette stitch (blocked). While gauge is important for size, the shawl is forgiving—focus on consistent tension for the best drape.
- Notions: Stitch markers (at least 2), tapestry needle for weaving in ends, blocking mats and pins for finishing.
Step-by-Step Instructions
This shawl is worked from the top center down to the scalloped edge, increasing on both sides of a central spine. The pattern uses both charted and written instructions for clarity—here, we provide the detailed written version. Take your time with the setup rows, as they establish the foundation for the entire project.
Abbreviations
- k = knit
- p = purl
- yo = yarn over
- k2tog = knit two together (right-leaning decrease)
- ssk = slip, slip, knit (left-leaning decrease)
- pm = place marker
- sm = slip marker
- RS = right side
- WS = wrong side
Setup
Cast on 5 stitches. Knit 6 rows (this creates a garter stitch base). This small foundation will be the center top of your shawl.
Row 1 (RS): k2, yo, k1, yo, k2 (7 stitches)
Row 2 (WS): k2, p3, k2
Row 3 (RS): k2, yo, k1, yo, k1, yo, k1, yo, k2 (11 stitches)
Row 4 (WS): k2, p7, k2
You now have 11 stitches total. The garter stitch edges (k2 on each side) will form the neat borders of your shawl.
Begin Lace Pattern
Place markers as follows: k2, pm, work center section, pm, k2. The center section will expand as you work the increases.
Row 5 (RS): k2, sm, yo, k1, yo, sm, k2 (increase 2—now 13 stitches)
Row 6 (WS): k2, sm, purl to next marker, sm, k2
Row 7 (RS): k2, sm, yo, k1, yo, k1, yo, k1, yo, sm, k2 (increase 4—now 17 stitches)
Row 8 (WS): k2, sm, purl to next marker, sm, k2
Repeat Rows 5–8 until you have 35 stitches between markers (approximately 10 repeats). This creates the expanding center section that will form the crescent shape. Remember to always keep the first and last 2 stitches in garter stitch (knit on both sides) for a clean edge.
Leaf and Vine Motif
Now the magic begins! The motif is worked over 12 rows and repeats across the center section. You will have a multiple of 12 stitches plus 1 between markers. The pattern below shows one full repeat—repeat the bracketed section across your row as needed.
Motif Row 1 (RS): k2, sm, *yo, ssk, k1, k2tog, yo, k1, yo, ssk, k1, k2tog, yo, k1* repeat from * to * until 1 stitch before marker, k1, sm, k2
Motif Row 2 (WS): k2, sm, purl all stitches to next marker, sm, k2
Motif Row 3 (RS): k2, sm, *k1, yo, ssk, k1, k2tog, yo, k3, yo, ssk, k1, k2tog, yo, k1* repeat from * to *, sm, k2
Motif Row 4 (WS): k2, sm, purl all stitches to next marker, sm, k2
Motif Row 5 (RS): k2, sm, *k2, yo, ssk, k1, k2tog, yo, k1, yo, ssk, k1, k2tog, yo, k2* repeat from * to *, sm, k2
Motif Row 6 (WS): k2, sm, purl all stitches to next marker, sm, k2
Motif Row 7 (RS): k2, sm, *k3, yo, ssk, k1, k2tog, yo, k1, yo, ssk, k1, k2tog, yo, k3* repeat from * to *, sm, k2
Motif Row 8 (WS): k2, sm, purl all stitches to next marker, sm, k2
Motif Row 9 (RS): k2, sm, *k4, yo, ssk, k1, k2tog, yo, k1, yo, ssk, k1, k2tog, yo, k4* repeat from * to *, sm, k2
Motif Row 10 (WS): k2, sm, purl all stitches to next marker, sm, k2
Motif Row 11 (RS): k2, sm, *k5, yo, ssk, k1, k2tog, yo, k1, yo, ssk, k1, k2tog, yo, k5* repeat from * to *, sm, k2
Motif Row 12 (WS): k2, sm, purl all stitches to next marker, sm, k2
Repeat the motif rows until the shawl measures approximately 20 inches from the center cast-on edge, ending with a WS row. As you work, you'll notice the leaf and vine pattern emerging beautifully—the yarn overs create the open, airy texture while the decreases shape the botanical forms.
Edging
The scalloped edging adds the perfect finishing touch, mimicking overlapping leaves.
Row 1 (RS): k2, sm, *yo, k2tog* repeat from * to * until 1 stitch before marker, k1, sm, k2
Row 2 (WS): k2, sm, purl all stitches to next marker, sm, k2
Row 3 (RS): k2, sm, *yo, k2tog* repeat from * to * until 1 stitch before marker, k1, sm, k2
Row 4 (WS): k2, sm, purl all stitches to next marker, sm, k2
Bind Off
Bind off loosely using this decorative method: k2, *k2tog, return stitch to left needle* repeat until all stitches are bound off. This creates a stretchy, picot-like edge that complements the lace. Weave in all ends with your tapestry needle.
Blocking
Blocking is essential for lace—it opens up the pattern and gives the shawl its beautiful drape. Soak the shawl in lukewarm water with a drop of mild soap for 20 minutes. Gently squeeze out excess water (do not wring). Lay flat on a blocking mat, pin out the scalloped edges and leaf points to open up the lace. Allow to dry completely before removing pins.
Your Whispering Willow Lace Shawl is now complete! The combination of the crescent shape, botanical motifs, and soft, drapey fabric makes this a truly special piece. Whether you wear it draped over your shoulders on a cool evening or gift it to someone special, this shawl is sure to be cherished. Happy knitting!