The Whispering Willow Lace Shrug Free Pattern – A Crocheted Breeze Through Autumn Leaves
The Whispering Willow Lace Shrug Free Pattern – A Crocheted Breeze Through Autumn Leaves
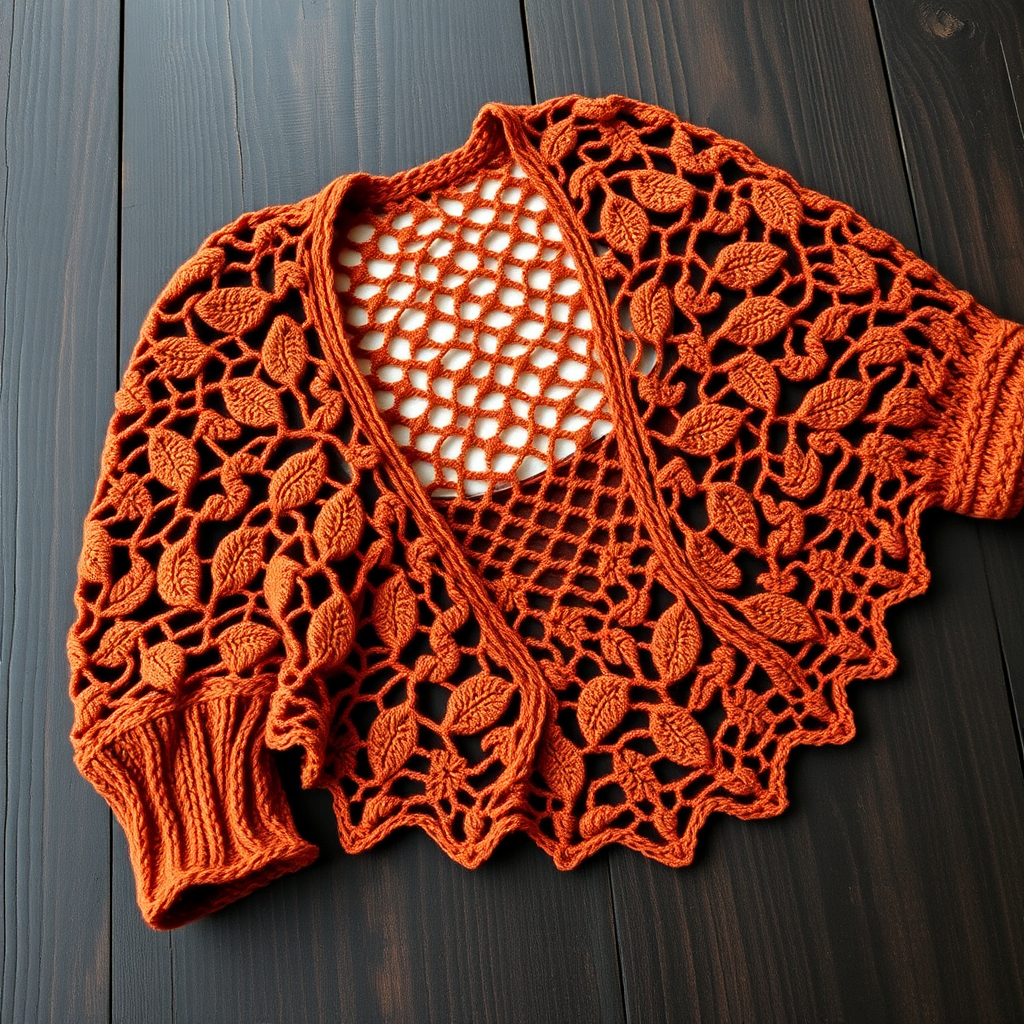
Wrap yourself in the delicate dance of falling leaves with this airy, openwork shrug that feels like a gentle woodland whisper. The intricate leaf-and-vine stitch pattern creates a romantic, ethereal layer perfect for cool evenings, autumn festivals, or any moment you want to add a touch of bohemian elegance to your wardrobe. This free crochet pattern is designed to be worked flat in one piece from cuff to cuff, making it surprisingly simple to construct while delivering a stunning, professional-looking result. Whether you're a seasoned crocheter or a confident beginner ready for a beautiful challenge, the Whispering Willow Lace Shrug will become a cherished piece in your handmade collection.
Materials Needed
Before you begin, gather the following supplies to ensure a smooth and enjoyable crocheting experience:
- Yarn: Worsted weight cotton-blend yarn in a warm terracotta or any color that speaks to your autumn soul. You will need approximately 600-700 yards (550-640 meters). The cotton blend provides excellent stitch definition for the lace pattern and a comfortable, breathable drape.
- Crochet Hook: 5.5 mm (I-9) crochet hook, or the size needed to achieve the correct gauge.
- Other Tools: Yarn needle for weaving in ends, scissors, and stitch markers (optional but helpful for keeping track of pattern repeats).
Gauge
4 repeats of leaf pattern (16 sts) x 8 rows = 4 inches (10 cm) in pattern stitch. Always take the time to check your gauge before starting. If your swatch is too small, try a larger hook; if it's too large, switch to a smaller hook. Matching gauge ensures your shrug will have the correct dimensions and fit beautifully.
Step-by-Step Instructions
Pattern Notes
- Worked flat in one piece from cuff to cuff, then seamed at the sides.
- Ch 3 counts as a double crochet (dc) throughout the pattern.
- The pattern is a multiple of 8 + 3 stitches.
- All rows are worked with the right side facing you after the initial setup, creating a seamless, reversible-looking lace.
Cuff (Make 2)
Each cuff is a simple rectangle of double crochet that will form the fitted wrist of the shrug.
Row 1: Chain (ch) 43. Double crochet (dc) in the 4th ch from the hook and in each ch across. (40 dc)
Rows 2-6: Ch 3, turn, dc in each dc across. (40 dc)
Fasten off. Set the first cuff aside. You will create the second cuff after the body is complete.
Body (Worked from Cuff to Cuff)
This is where the magic happens. The body is built by attaching your yarn to the edge of the first cuff and working the leaf-and-vine pattern across, creating a wide, lacy rectangle that will form the back and sleeves of the shrug.
Row 1 (Right Side): With the right side of the cuff facing you, attach your yarn to the top edge of the cuff. Ch 3 (counts as first dc), work 2 dc in the same stitch (this forms the first half of a leaf cluster). *Ch 2, skip 2 stitches, dc in the next stitch, ch 2, skip 2 stitches, 3 dc in the next stitch.* Repeat from * to * across the row, ending with 3 dc in the last stitch. (You will have 5 leaf clusters).
Row 2: Ch 3, turn. Work 2 dc in the first stitch (the base of the ch 3). *Ch 2, dc in the next ch-2 space, ch 2, 3 dc in the center dc of the next cluster.* Repeat from * to * across the row, ending with 3 dc in the last stitch.
Rows 3-40: Repeat Row 2, maintaining the pattern consistently. The fabric will grow into a wide, lacy rectangle. The leaf clusters will align beautifully, creating the intricate leaf-and-vine design. Continue until you have completed Row 40.
Shaping the Sleeves
After the lacy body, we add a solid section to create structure and shape for the sleeves.
Row 41: Ch 3, turn. Dc in each stitch and in each ch-2 space across, working 2 dc in each ch-2 space. (Approximately 120 dc)
Rows 42-46: Ch 3, turn, dc in each dc across. (120 dc)
Fasten off.
Second Cuff
Now, you'll add the second cuff to the opposite end of the body.
Attach your yarn to the opposite edge of the body (the starting edge of Row 1). Repeat the Cuff instructions (Rows 1-6) to create the second cuff. Fasten off.
Seaming
This step transforms your flat rectangle into a wearable shrug.
Fold the shrug in half so the cuffs are at the ends and the body forms the back. The lacy section will be the back of the shrug, and the solid sleeve sections will be at the sides. Sew the side seams from the cuff edge inward for about 6 inches (15 cm) on each side, leaving the center open for the armholes. Use a yarn needle and a whip stitch or mattress stitch for a neat, invisible seam.
Edging
A simple border adds a polished finish to the entire opening.
Attach your yarn to the bottom edge of the shrug. Single crochet (sc) evenly around the entire opening (the bottom edge and the front edges), working 3 sc in each corner to ensure the corners lie flat. Join with a slip stitch to the first sc, fasten off, and weave in all ends.
Your Whispering Willow Lace Shrug is complete! Lay it flat to block it, gently shaping the lace to open up the leaf motifs. Once dry, it's ready to wear. Pair it with a simple tank top and jeans for a bohemian look, or throw it over a sundress for a romantic evening layer. Enjoy the compliments and the cozy, ethereal warmth of your handmade creation!


