The Whispering Willow Wrap Free Pattern – Knit a Misty Meadow Shawl
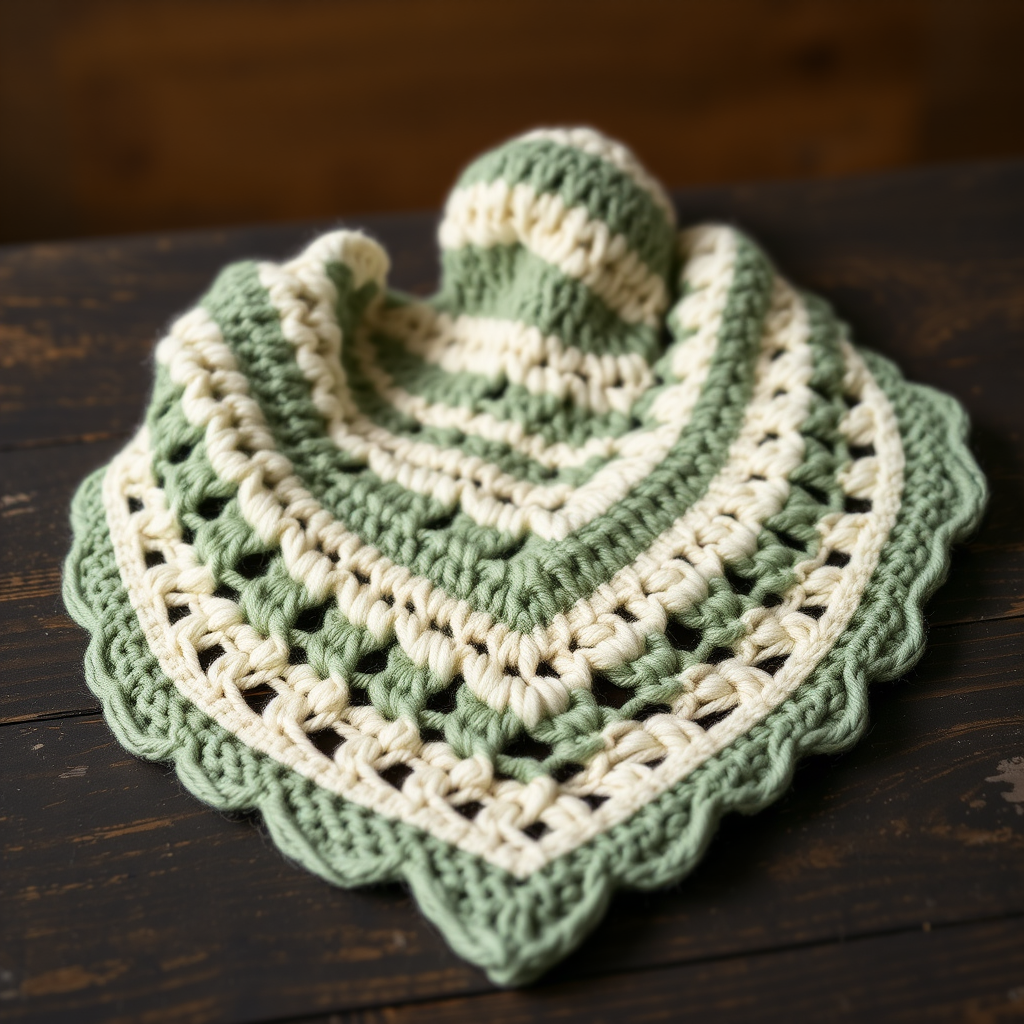
The Whispering Willow Wrap: A Misty Meadow Shawl You'll Love to Knit
Imagine wrapping yourself in the soft embrace of a misty meadow, where delicate willow leaves dance in a gentle breeze. That's the magic of the Whispering Willow Wrap—a flowing, textured shawl that combines delicate lace panels with cozy garter ridges for a truly enchanting knit. This free pattern is perfect for intermediate knitters looking to expand their skills, and the result is a stunning, wearable piece of art.
With its calming sage green and cream stripes, this shawl evokes a foggy morning in a green meadow. The triangular shape drapes elegantly over your shoulders, making it the perfect accessory for cool evenings, cozy reading nooks, or as a thoughtful handmade gift. Let's dive into this beautiful project!
Materials Needed
Before you begin, gather these supplies to ensure a smooth knitting experience:
- Yarn: Worsted weight yarn in sage green (MC) and cream (CC), approximately 800 yards MC and 200 yards CC. A soft wool blend or acrylic works beautifully.
- Needle: US 8 (5.0 mm) circular knitting needle, 32 inches or longer (to accommodate the growing number of stitches).
- Gauge: 18 stitches and 24 rows = 4 inches in stockinette stitch (blocked). Gauge is important for the final size, so take a moment to swatch!
- Notions: Stitch markers (optional but helpful), tapestry needle for weaving in ends, and blocking pins.
Step-by-Step Instructions
This shawl is worked from the top down in a triangular shape. The pattern uses a combination of garter stitch, stockinette, and a simple lace repeat. Don't be intimidated by the lace—once you get the rhythm, it's quite meditative!
Abbreviations
- k = knit
- p = purl
- yo = yarn over
- k2tog = knit two together (right-leaning decrease)
- ssk = slip, slip, knit (left-leaning decrease)
- MC = main color (sage green)
- CC = contrast color (cream)
Setup: Creating the Foundation
With MC, cast on 3 stitches.
- Row 1 (RS): k1, yo, k1, yo, k1 (5 stitches)
- Row 2 (WS): k2, p1, k2
- Row 3 (RS): k2, yo, k1, yo, k2 (7 stitches)
- Row 4 (WS): k2, p3, k2
- Row 5 (RS): k2, yo, k3, yo, k2 (9 stitches)
- Row 6 (WS): k2, p5, k2
- Row 7 (RS): k2, yo, k5, yo, k2 (11 stitches)
- Row 8 (WS): k2, p7, k2
You've now created the base of your triangle. Notice how the garter stitch edges (the first and last 2 stitches) form a neat border, while the center grows with each increase row.
Body: Working the Lace Pattern
Now you'll continue increasing at the beginning and end of every RS row (after the first 2 stitches and before the last 2 stitches) by working a yo. The center section will be worked in a beautiful lace pattern that resembles willow leaves.
Lace Pattern (multiple of 6 + 1):
- Row 1 (RS): k2, yo, *k1, yo, ssk, k3, yo, k2tog, k1, yo* repeat from * to * until last 2 stitches, yo, k2
- Row 2 (WS): k2, p to last 2 stitches, k2
- Row 3 (RS): k2, yo, *k2, yo, ssk, k1, k2tog, yo, k2, yo* repeat from * to * until last 2 stitches, yo, k2
- Row 4 (WS): k2, p to last 2 stitches, k2
- Row 5 (RS): k2, yo, *k3, yo, ssk, yo, k3, yo* repeat from * to * until last 2 stitches, yo, k2
- Row 6 (WS): k2, p to last 2 stitches, k2
Repeat these 6 rows for the lace pattern. As you work, you'll notice the increases at the edges keep the triangle shape, while the lace pattern creates those lovely openwork "willow leaves" in the center.
Stripe Sequence: Work in MC for 12 inches, then switch to CC for 4 inches, then back to MC for 12 inches, then CC for 4 inches, and finally MC for 12 inches. You can adjust the stripe sequence as desired—make it your own!
Continue working in pattern until the shawl measures approximately 30 inches from the cast-on edge, ending with a WS row. This gives you a generous, wrap-around size.
Edging: The Finishing Touch
Switch to CC. Work 6 rows of garter stitch (knit every row), maintaining the increases at the edges on RS rows. This creates a cozy, textured border that frames the lace beautifully.
Bind Off (Loosely)
On the next RS row, bind off all stitches knitwise, but do not tighten too much. To keep the edge stretchy and prevent it from pulling, you can use a larger needle or a yarn-over bind off:
- k2, *yo, k2tog, pass the first stitch over the second* repeat from * to * until all stitches are bound off.
This stretchy bind-off is essential for a shawl—it ensures the edge drapes beautifully and doesn't curl.
Finishing: Blocking for Perfection
Weave in all ends with your tapestry needle. Now for the magical part—blocking! Gently wet-block the shawl to open up the lace pattern and create a beautiful drape. Pin out the edges to shape the triangle, stretching the lace gently to reveal the leaf-like motifs. Allow it to dry completely before unpinning.
Once dry, your Whispering Willow Wrap is ready to wear! The combination of smooth stockinette, airy lace holes, and cozy garter ridges creates a texture that's both elegant and comforting. Drape it over your shoulders and enjoy the misty meadow embrace.
Happy knitting! Share your finished shawl with us—we'd love to see your color choices and how the willow leaves dance in your version.



