Velvet Vine Curb Chain Necklace Free Pattern – Knit a Plush Statement Chain
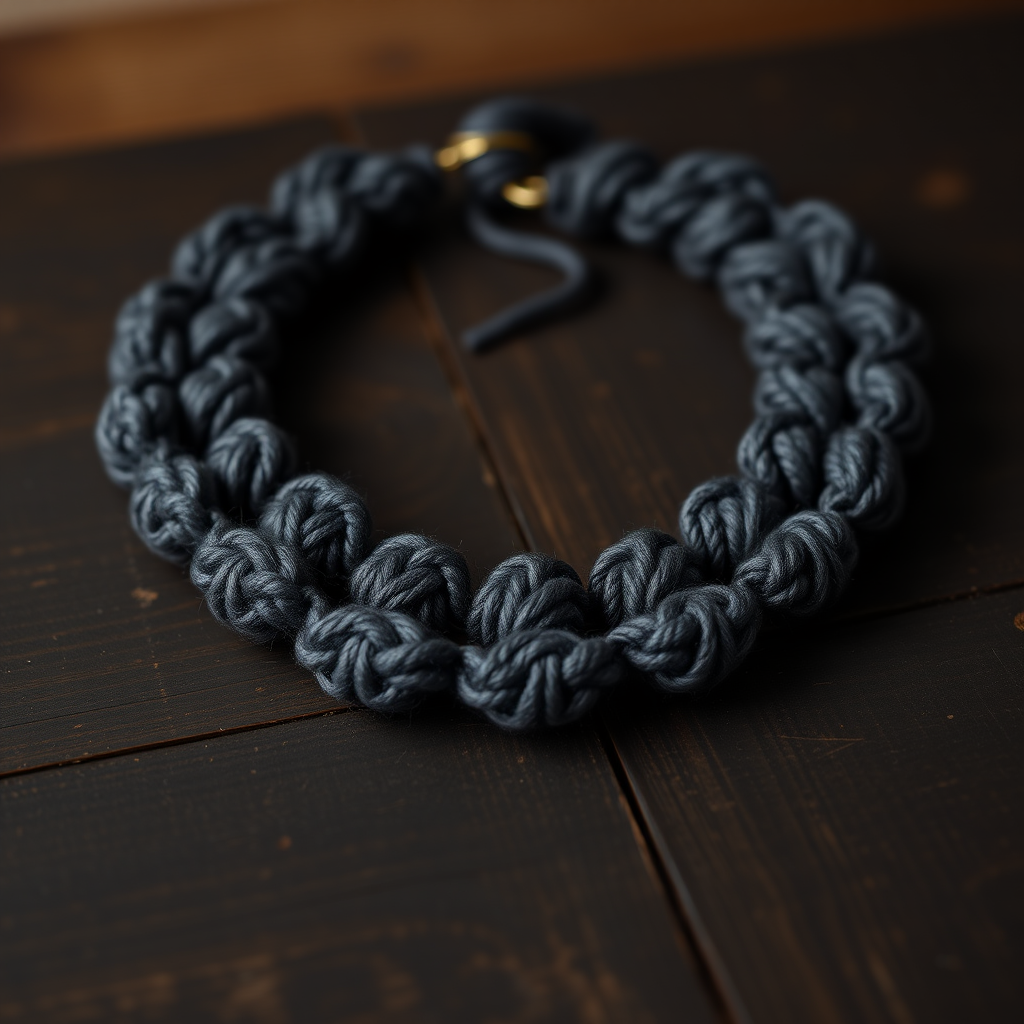
Velvet Vine Curb Chain Necklace Free Pattern – Knit a Plush Statement Chain
Wrap yourself in the coziest accessory of the season with this knitted curb chain necklace, a soft and sculptural take on a classic metal link. This free pattern uses chunky yarn and simple stitches to create a luxurious, wearable piece that feels like a warm hug. Whether you're dressing up a simple sweater or adding texture to a casual outfit, this plush statement chain is sure to become your new favorite handmade accessory.
Why You'll Love This Pattern
This project is perfect for beginners and experienced knitters alike. It uses only knit and purl stitches, so if you can cast on, knit, purl, and bind off, you can make this stunning necklace. The clever construction—knitting narrow strips, then folding and seaming them—creates the illusion of interlocking chain links without any complicated techniques. Plus, it works up quickly with super bulky yarn, making it an ideal weekend project.
Materials Needed
Before you begin, gather the following supplies:
- Yarn: Super bulky weight yarn (size 6), approximately 60-80 yards. Recommended: Lion Brand Wool-Ease Thick & Quick in 'Charcoal' or 'Cream' (or any super bulky yarn of your choice).
- Knitting Needles: US 11 (8.0 mm) knitting needles, or size needed to achieve gauge.
- Yarn Needle: For seaming and weaving in ends.
- Scissors: For cutting yarn.
- Optional: Large button (for closure) and matching yarn for sewing.
Gauge
10 stitches x 14 rows = 4 inches in stockinette stitch. Gauge is not critical for this project, but aim for a dense, firm fabric so the links hold their shape well. If your stitches are loose, try using a smaller needle size.
Abbreviations
- K = knit
- P = purl
- K2tog = knit two stitches together (decrease)
- st(s) = stitch(es)
- CO = cast on
- BO = bind off
Step-by-Step Instructions
Understanding the Construction
This necklace is knitted as a series of long, narrow strips that are folded and seamed to create the illusion of interlocking chain links. You will make 12 total strips—6 of one type (Link 1) and 6 of another (Link 2)—though they are knitted identically. The difference comes in how they are assembled. The key is to knit tightly so the fabric holds its shape and creates that plush, rounded look.
Link 1 (Make 6)
- Cast On: CO 8 stitches.
- Row 1: Knit all stitches.
- Row 2: Purl all stitches.
- Repeat Rows 1-2 until the piece measures 4 inches from the cast-on edge. End with a purl row (so the next row will be a knit row).
- Decrease Row 1: K2tog across the row (4 stitches remain).
- Next Row: Purl across all stitches.
- Decrease Row 2: K2tog twice (2 stitches remain).
- Next Row: Purl across all stitches.
- Final Decrease: K2tog (1 stitch remains).
- Finish: Cut yarn, leaving a 6-inch tail. Pull the tail through the last loop to secure. This creates a tapered end that will be tucked inside the link during assembly.
Link 2 (Make 6)
- Cast On: CO 8 stitches.
- Rows 1-2: Repeat the same as Link 1—knit one row, purl one row—until the piece measures 4 inches from the cast-on edge. End with a purl row.
- Decrease Row 1: K2tog across the row (4 stitches remain).
- Next Row: Purl across all stitches.
- Decrease Row 2: K2tog twice (2 stitches remain).
- Next Row: Purl across all stitches.
- Final Decrease: K2tog (1 stitch remains).
- Finish: Cut yarn, leaving a 6-inch tail. Pull the tail through the last loop to secure.
Note: Links 1 and 2 are knitted identically. The distinction is only for assembly purposes to help you keep track of alternating links.
Assembly: Creating the Chain
Now comes the fun part—turning your knitted strips into a beautiful chain necklace. Follow these steps carefully to create the interlocking link effect.
Step 1: Position the First Two Links
- Lay one Link 1 flat on your work surface.
- Take one Link 2 and place it perpendicular to Link 1, crossing at the center. The tapered ends of both links should point outward, away from the center crossing point.
Step 2: Fold and Enclose
- Fold Link 1 in half, bringing the tapered end to meet the cast-on edge. The Link 2 should be sandwiched inside the fold, with its tapered ends sticking out on either side.
- Thread your yarn needle with a length of matching yarn (about 12 inches).
- Whipstitch the cast-on edge of Link 1 to its tapered end, enclosing Link 2 inside. Make sure your stitches are secure and evenly spaced. This creates a single chain link with Link 2 passing through it.
Step 3: Continue Adding Links
- Take another Link 1 and place it perpendicular to the free end of Link 2 (the end that is sticking out from the first assembled link).
- Fold Link 1 in half, sandwiching the free end of Link 2 inside, and whipstitch the cast-on edge to the tapered end as before.
- Repeat this process, alternating Link 1 and Link 2, until you have connected all 12 links (6 total chain links, each made from one Link 1 and one Link 2).
Step 4: Finishing Touches
- After all links are connected, try the necklace on to check the length. It should drape elegantly around your neck.
- Optional Closure: If you'd like a closure, knit a small i-cord: CO 3 stitches, knit every row for 2 inches, then BO. Sew this loop to one end of the necklace. Sew a large button to the other end, positioned to fit through the loop.
- Alternative Finish: For a casual, bohemian look, simply tie the two ends of the necklace together in a loose overhand knot, leaving a small tail of yarn.
- Weave in Ends: Use your yarn needle to weave in all loose ends carefully, hiding them within the links.
- Blocking (Optional): If desired, gently steam block the necklace to even out the stitches. Be careful not to stretch the links—you want them to maintain their plump, rounded shape.
Tips for Success
- Knit Tightly: The key to this project is a firm, dense fabric. If your knitting is loose, the links will look floppy instead of sculptural. Consider using a smaller needle if needed.
- Consistent Tension: Try to keep your tension consistent throughout all 12 strips so the links are uniform in size.
- Secure Seaming: Take your time with the whipstitch seam. It holds the entire necklace together, so make sure it's sturdy.
- Customize: Feel free to experiment with different yarn colors or add beads for extra flair. You can also make the necklace longer by adding more links.
Care Instructions
To keep your knitted necklace looking its best, hand wash it gently in cool water with a mild detergent. Lay it flat to dry, reshaping the links as needed. Avoid hanging it while wet, as the weight of the yarn could stretch the links.
This Velvet Vine Curb Chain Necklace is more than just an accessory—it's a cozy, handmade statement piece that showcases your creativity. Whether you make it for yourself or as a thoughtful gift, it's sure to be treasured. Happy knitting!



