Whirlwind Twisted Headband Free Pattern
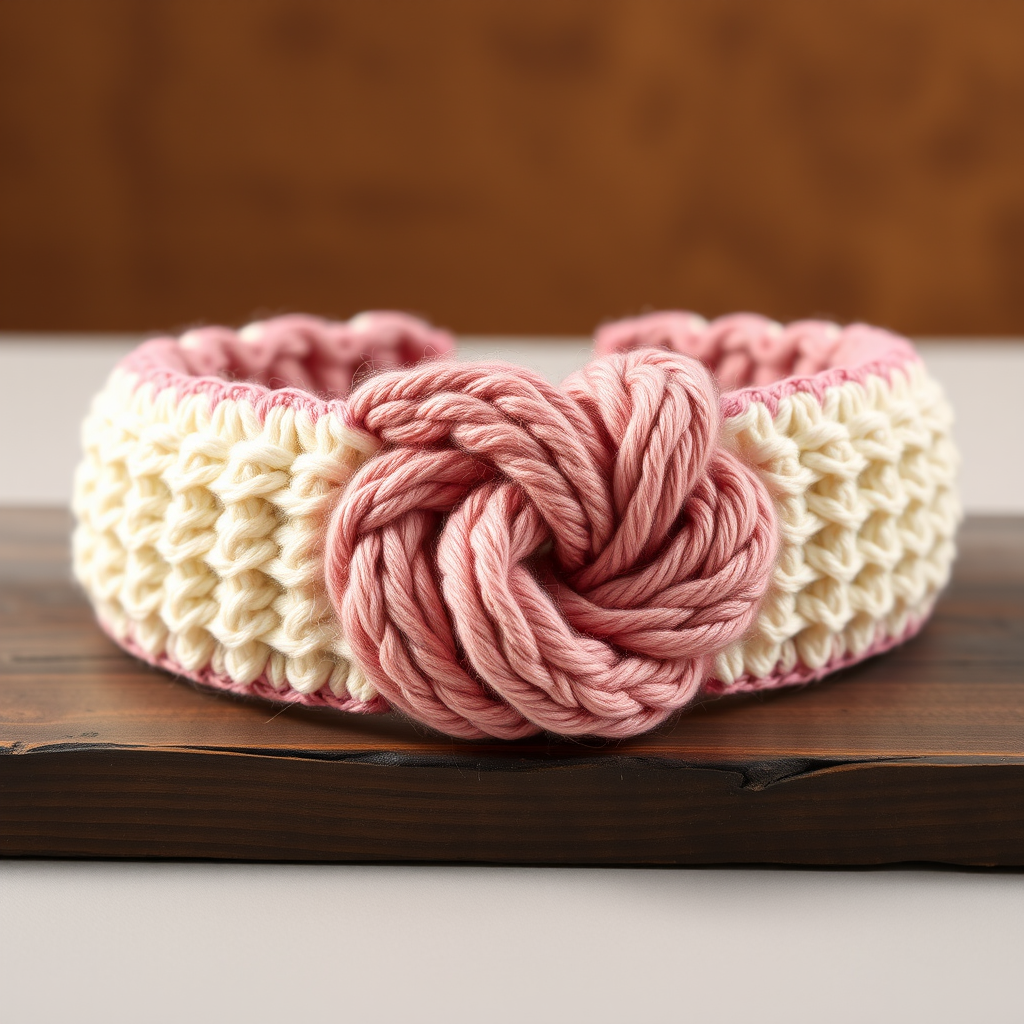
The Whirlwind Twisted Headband: A Cozy, Beginner-Friendly Crochet Project
Are you looking for a quick, stylish, and satisfying crochet project? Look no further than the Whirlwind Twisted Headband! This modern accessory is the perfect blend of cozy comfort and elegant design. Its unique braided center looks intricate and complex, but the technique is surprisingly simple, making it an ideal project for beginners and a delightful quick make for experienced crafters. Whether you're bundling up for a winter walk or adding a handmade touch to a fall outfit, this headband is a versatile addition to any wardrobe. Let's dive into how you can create this beautiful, braided accessory at home.
Materials Needed
Before you begin, gather these simple materials. This project is wonderfully portable and requires very little yarn, making it perfect for using up scraps from your stash.
- Yarn: Worsted weight yarn in two contrasting colors. The featured design uses a soft Cream (Color A) and a Dusty Rose (Color B). You will need approximately 100 yards of each color. Any worsted weight yarn (like a #4 medium) will work beautifully.
- Crochet Hook: US Size I/9 (5.5 mm) crochet hook. Ensure your hook size matches your yarn weight for the best drape and texture.
- Other Tools: A yarn needle for sewing the pieces together and weaving in ends, plus a pair of scissors.
- Optional Embellishments: A decorative button or a small crocheted flower to add a personal touch at the seam.
Step-by-Step Instructions
This headband is created by crocheting two separate, long strips and then twisting them together to form the signature braided look. Follow these detailed instructions carefully, and you'll have a beautiful headband in no time.
Crocheting the Strips (Make 2)
You will create two identical strips, one in each color. The gauge for this project is 14 single crochet (sc) stitches and 16 rows to equal a 4-inch square. However, since we are working in a long strip, the most important measurement is the length.
Strip 1 (Color A - Cream):
- Foundation Row: Make a slip knot and chain (ch) 10 stitches.
- Row 1: Insert your hook into the 2nd chain from your hook. Pull up a loop and complete a single crochet (sc) stitch. Continue making 1 sc in each of the remaining chains across. You should have a total of 9 sc stitches.
- Row 2: Chain 1 (this counts as your turning chain, not a stitch), then turn your work. Make 1 sc in the first stitch and in each stitch across the row. You will still have 9 sc stitches.
- Repeat: Continue repeating Row 2. Keep crocheting until your strip measures 20 inches (50 cm) long. This length is a standard size, but you can adjust it based on your head circumference. A good rule of thumb is to make it 2 inches shorter than your actual head measurement to allow for stretch.
- Finish: Once you reach your desired length, fasten off your yarn. Be sure to leave a long tail (at least 12 inches) for sewing the pieces together later.
Strip 2 (Color B - Dusty Rose):
- Repeat the exact same instructions as Strip 1, but this time using your Color B yarn.
- Fasten off, again leaving a long tail for sewing.
Joining and Twisting the Strips
This is where the magic happens! Creating the twist is easier than it looks. Follow these steps to form the beautiful braided center.
- Lay the Strips Flat: Place both finished strips on a flat surface in front of you. Position them so they cross each other in the middle, forming an "X" shape. Make sure the right sides of the fabric are facing up.
- Create the Twist (Left Side): Take the left end of Strip 1 (Color A). Bring it over the right end of Strip 2 (Color B). Then, tuck it under the middle section of Strip 2. You are essentially wrapping it around the center.
- Create the Twist (Right Side): Now, take the right end of Strip 1 (Color A). Bring it over the left end of Strip 2 (Color B). Then, tuck it under the middle section of Strip 2, just like you did with the left side.
- Adjust the Tension: Gently pull on the ends of both strips to tighten the twist. Adjust the fabric so the braided twist is perfectly centered and the tension is even. You should see a beautiful, symmetrical braid forming in the middle.
Sewing the Headband Together
Now that your twist is perfect, it's time to turn the strips into a wearable loop.
- Align the Ends: With the right sides of the fabric facing each other, align the short ends of both strips together. The edges should match up neatly. The seam will be at the back of the headband.
- Whip Stitch the Seam: Thread your yarn needle with one of the long tails you left earlier. Using a whip stitch, sew the two ends together securely. Insert the needle through the loops of the stitches on both edges, creating a sturdy seam. Go back and forth a couple of times to reinforce it.
- Weave in Ends: Once the seam is secure, weave in the yarn tail and any other loose ends using your yarn needle. Weave them through the stitches on the inside of the headband to hide them completely. Trim any excess yarn.
Finishing Touches and Fit Adjustments
Your headband is almost complete! Here are a few final steps to ensure a perfect fit and finish.
- Check the Fit: Fold the headband in half so the seam is at the back. Place it on your head to check the fit. It should feel snug but comfortable.
- Adjusting the Size:
- If it's too loose: You can sew a small gather at the seam. Simply thread your yarn needle with a piece of yarn, run it through the seam stitches, and pull gently to cinch it tighter. Secure with a knot.
- If it's too tight: Unfortunately, it's hard to add length after joining. If this happens, you can undo the seam and add a few more rows to each strip before re-joining them.
- Add a Decorative Flair (Optional): To give your headband a unique touch, you can sew a decorative button or a small crocheted flower onto the back seam. This adds a charming detail and helps hide the seam completely.
And there you have it! Your very own Whirlwind Twisted Headband. This project is a fantastic way to practice your single crochet and learn a simple joining technique that creates a stunning result. It also makes a wonderful handmade gift for friends and family. Happy crocheting!


