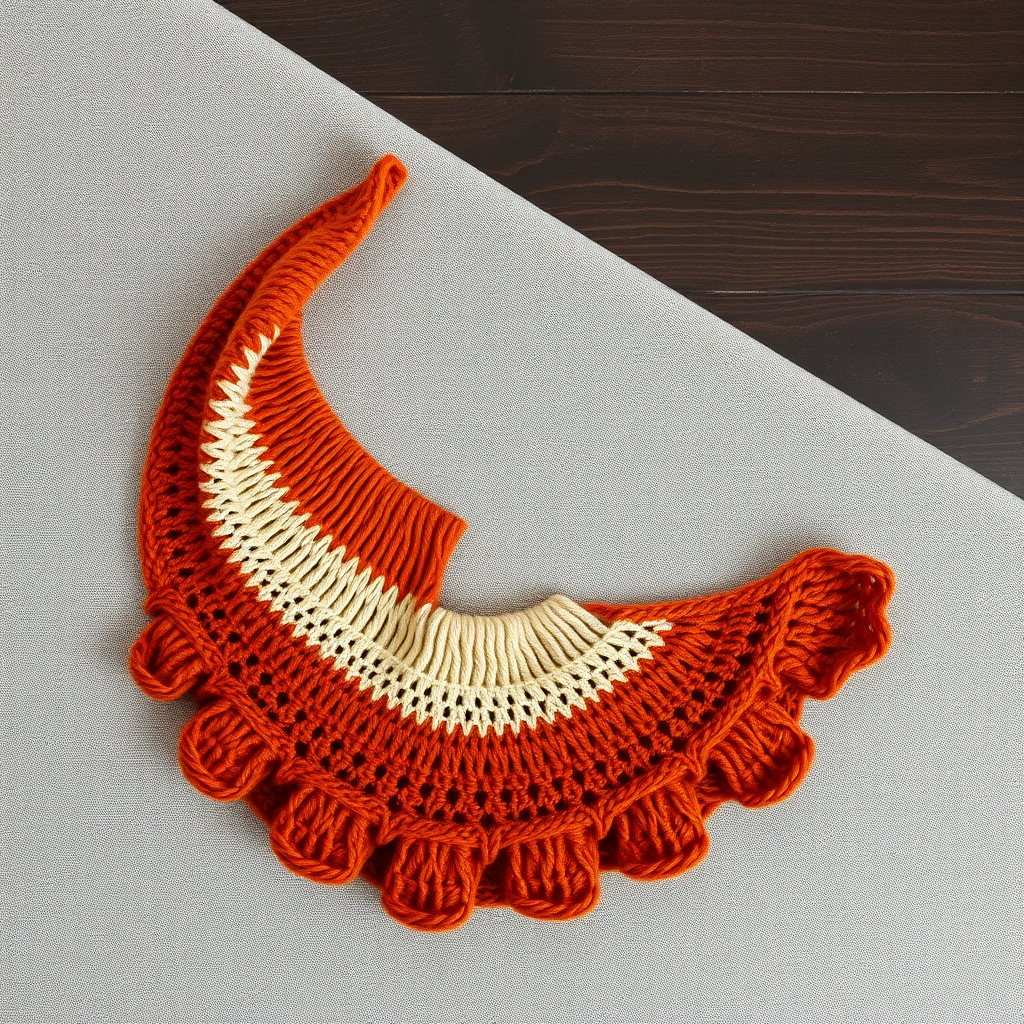
Whispering Dunes Crescent Shawl Free Pattern – Knit a Desert Mirage Wrap

Whispering Dunes Crescent Shawl Free Pattern – Knit a Desert Mirage Wrap
Wrap yourself in the shifting sands of a desert sunset with this crescent-shaped shawl, knitted in a mesmerizing gradient of terracotta, amber, and dusty rose. The unique slipped-stitch texture mimics the rippled patterns of wind-blown dunes, creating a lightweight yet cozy accessory that drapes beautifully. This free knitting pattern is perfect for intermediate knitters looking to expand their skills while creating a stunning, bohemian statement piece.
Whether you're a seasoned knitter or a confident beginner ready for a challenge, the Whispering Dunes shawl offers a rewarding project with its rhythmic stitch pattern and breathtaking color transitions. The crescent shape is universally flattering, and the fingering-weight yarn ensures a drapey, elegant finish that can be worn from beach bonfires to evening soirées.
Materials Needed
Before you begin your knitting journey, gather the following materials to ensure a smooth and enjoyable crafting experience:
Yarn
- Fingering weight yarn in 3 colors (approximately 400 yards each):
- Color A: Terracotta (deep, earthy red-orange)
- Color B: Amber (warm, golden honey)
- Color C: Dusty Rose (soft, muted pink)
Tip: Choose yarns with similar fiber content (e.g., merino, silk blends) for consistent drape and blocking behavior.
Needles
- US 6 (4.0 mm) circular knitting needle, 32-inch (80 cm) or longer. The long cord is essential to accommodate the growing number of stitches as the shawl expands.
Gauge
- 22 stitches and 32 rows = 4 inches (10 cm) in stockinette stitch (after blocking).
Note: Gauge is crucial for achieving the correct size and drape. Always knit a swatch and block it before measuring.
Additional Supplies
- Stitch markers (at least 2, preferably locking)
- Tapestry needle for weaving in ends
- Blocking mats and pins
- Scissors
Step-by-Step Instructions
This crescent shawl is knit from the top center outwards, increasing at the edges and center to create a gentle arc. The slipped-stitch pattern creates a subtle honeycomb-like texture that catches the light beautifully. Follow these detailed instructions carefully, and you'll have a stunning desert-inspired wrap in no time.
Abbreviations
- k = knit
- p = purl
- sl = slip stitch purlwise (unless otherwise stated)
- yo = yarn over
- k2tog = knit two together (right-leaning decrease)
- ssk = slip, slip, knit (left-leaning decrease)
- pm = place marker
- sm = slip marker
Setup Section
Step 1: With Color A (terracotta), cast on 7 stitches using your preferred method (long-tail cast on works well).
Step 2 (WS - Wrong Side): k2, yo, k1, yo, k1, yo, k1, yo, k2 — you should now have 11 stitches on your needle.
Step 3 (RS - Right Side): k2, yo, k1, yo, k3, yo, k1, yo, k3, yo, k1, yo, k2 — you should now have 17 stitches.
Step 4 (WS): k2, yo, purl to last 2 stitches, yo, k2 — you should now have 19 stitches.
Step 5: Place a stitch marker in the center of your work. To find the center, count your stitches and place the marker after the 10th stitch (you should have 9 stitches on each side of the marker). This marker will be referred to as the "center marker" throughout the pattern.
Increase Section (Rows 4-10)
This section establishes the crescent shape by increasing at both edges and at the center point.
Row 4 (RS): k2, yo, k1, yo, knit to center marker, yo, k1, yo, knit to last 2 stitches, yo, k2 — this row increases 4 stitches (2 at each edge and 2 at the center).
Row 5 (WS): k2, yo, purl to last 2 stitches, yo, k2 — this row increases 2 stitches (1 at each edge).
Repeat Rows 4-5 until you have 43 stitches total, ending with a WS row. Your work should measure approximately 2 inches from the cast-on edge.
Pro Tip: Always knit the first 2 stitches and last 2 stitches of every row to create a neat, stable edge for picking up stitches later (if desired) and for a clean finish.
Body Pattern (Using Color A)
Now you'll begin the beautiful slipped-stitch pattern that creates the dune-like texture. This pattern is worked over the body of the shawl while maintaining the edge increases.
Row 1 (RS): k2, yo, k1, yo, *sl1, k1, yo, k2tog, sl1, k1, yo, k2tog* repeat from * to * until 2 stitches before center marker, k2, sm, k1, sm, k2, repeat from * to * until 2 stitches before end, yo, k1, yo, k2
Detailed breakdown of Row 1:
- Knit 2 (edge stitches)
- Yarn over (increase)
- Knit 1
- Yarn over (increase)
- Begin pattern repeat: slip 1 stitch purlwise, knit 1, yarn over, knit 2 together, slip 1 purlwise, knit 1, yarn over, knit 2 together
- Repeat this 8-stitch pattern until you have 2 stitches before the center marker
- Knit 2
- Slip center marker
- Knit 1 (center stitch)
- Slip center marker
- Knit 2
- Repeat the pattern from * to * until 2 stitches remain before the end of the row
- Yarn over, knit 1, yarn over, knit 2 (edge increases and edge stitches)
Row 2 (WS): k2, yo, purl to last 2 stitches, yo, k2
Row 3 (RS): k2, yo, k1, yo, *k1, sl1, k1, yo, k2tog, k1, sl1* repeat until 2 stitches before center, k2, sm, k1, sm, k2, repeat until 2 stitches before end, yo, k1, yo, k2
Detailed breakdown of Row 3:
- Knit 2 (edge stitches)
- Yarn over (increase)
- Knit 1
- Yarn over (increase)
- Begin pattern repeat: knit 1, slip 1 purlwise, knit 1, yarn over, knit 2 together, knit 1, slip 1 purlwise
- Repeat this 7-stitch pattern until you have 2 stitches before the center marker
- Knit 2
- Slip center marker
- Knit 1 (center stitch)
- Slip center marker
- Knit 2
- Repeat the pattern from * to * until 2 stitches remain before the end
- Yarn over, knit 1, yarn over, knit 2
Row 4 (WS): Same as Row 2: k2, yo, purl to last 2 stitches, yo, k2
Repeat Rows 1-4 until the piece measures 12 inches (30 cm) from the cast-on edge, ending with a WS row (Row 2 or 4 of the pattern).
Important: The slipped stitches should always be slipped purlwise with the yarn in back (wyib) on RS rows. On WS rows, you're purling, so the slipped stitches from the previous row will naturally create the texture.
Color Transition to Color B (Amber)
Step 1: Cut Color A, leaving a 6-inch tail for weaving in later.
Step 2: Join Color B (amber) with a slip knot on your needle or simply start knitting with the new yarn, leaving a tail.
Step 3: Work 2 rows in stockinette stitch (RS knit, WS purl) while continuing the edge increases as before:
- RS row: k2, yo, knit to last 2 stitches, yo, k2
- WS row: k2, yo, purl to last 2 stitches, yo, k2
Step 4: After these 2 stockinette rows, continue the body pattern (Rows 1-4) with Color B for 12 inches (30 cm), ending with a WS row.
Tip: When changing colors, twist the old and new yarns together on the WS to avoid holes.
Color Transition to Color C (Dusty Rose)
Step 1: Cut Color B, leaving a 6-inch tail.
Step 2: Join Color C (dusty rose) in the same manner as before.
Step 3: Work 2 rows in stockinette stitch with edge increases (as described above).
Step 4: Continue the body pattern (Rows 1-4) with Color C for 12 inches (30 cm), ending with a WS row.
Edging
Now you'll create a delicate, lacy border that frames the shawl beautifully.
Step 1: With Color C still attached, work 6 rows of garter stitch (knit every row) while continuing the edge increases:
- RS rows: k2, yo, knit to last 2 stitches, yo, k2
- WS rows: k2, yo, knit to last 2 stitches, yo, k2
Note: In garter stitch, you knit every row, so both RS and WS rows are identical in terms of the knit stitch, but you still maintain the increases.
Step 2: After completing 6 rows of garter stitch, bind off loosely. To bind off loosely, use a needle one or two sizes larger, or use the following method: knit 2 stitches, *insert left needle into the 2 stitches on the right needle and knit them together through the back loop, knit 1 stitch, repeat from * until all stitches are bound off. This creates a stretchy, picot-like edge.
Alternative loose bind-off: Knit 2, *pass the first stitch over the second, knit 1, repeat from * — this is a standard bind-off but work it very loosely.
Finishing
Step 1: Weave in all ends using a tapestry needle. Be sure to weave in ends on the wrong side of the work, following the path of the yarn to keep them invisible.
Step 2: Block the shawl aggressively to open up the lace and set the crescent shape. Here's how:
- Fill a basin with lukewarm water and add a small amount of wool wash or mild detergent.
- Submerge the shawl and let it soak for 20-30 minutes. Do not agitate.
- Gently press out excess water (do not wring or twist).
- Roll the shawl in a clean towel to remove additional moisture.
- Lay the shawl on blocking mats and pin it out to the desired crescent shape. The top edge should be relatively straight, while the bottom edge curves gently.
- Pin the edges to create a gentle curve, stretching the lace pattern to open it up.
- Allow to dry completely (24-48 hours) before unpinning.
Step 3: Once dry, remove the pins and admire your beautiful Whispering Dunes Crescent Shawl!
Tips for Success
- Count your stitches regularly — especially after the increase rows — to ensure you're maintaining the correct stitch count.
- Use locking stitch markers for the center marker so it doesn't accidentally slip out.
- Keep your slipped stitches loose — don't pull the yarn too tight when slipping, or the fabric will pucker.
- Blocking is essential — this pattern truly comes alive after blocking, so don't skip this step!
- Customize the length — feel free to adjust the number of pattern repeats in each color section to make the shawl larger or smaller.
This Whispering Dunes Crescent Shawl is a labor of love that rewards you with a stunning, wearable piece of art. The gradient colors evoke the warm hues of a desert sunset, while the textured stitch pattern captures the essence of wind-blown sand. Whether you're knitting it for yourself or as a gift for someone special, this shawl is sure to become a cherished treasure.
Happy knitting, and may your stitches always be even and your yarn never tangle!